Thursday, December 26, 2013

Profiteroles ~ from Dough to Swans

The first time I made profiteroles my oldest niece, M, who is now in her early 30's, was about 4 years old.  They were at my house in NY for Christmas.  I asked her if she wanted to help make dessert and of course she did.  Her Mom just about fainted when she walked into the kitchen, because I had M on a stool at the stove helping me make the dough.  She looked as if she could've done a nose dive into the pot.  I didn't know at the time that maybe 4 year old's shouldn't be at the stove, or maybe I learned they could be because my own son has helped in the kitchen since he was 2.  But that year and every year there after, my profiteroles have turned out great!!

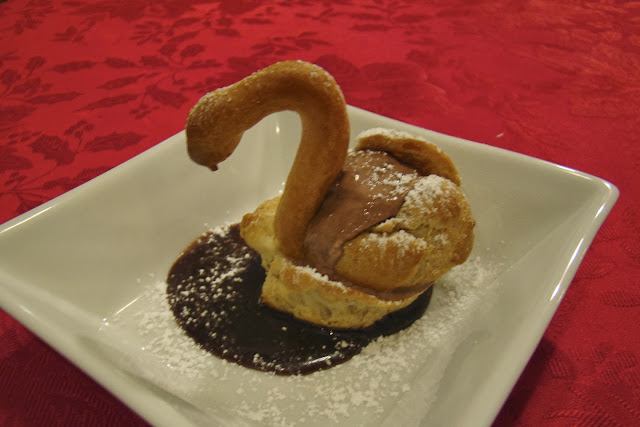
Since that time, I have made profiteroles about 1/2 dozen times, but this year, I fashioned the profiteroles into swans.  This is probably elementary and something many of us have eaten, but not being a pastry chef or a chef of any sort, I had to think about how this is actually done.
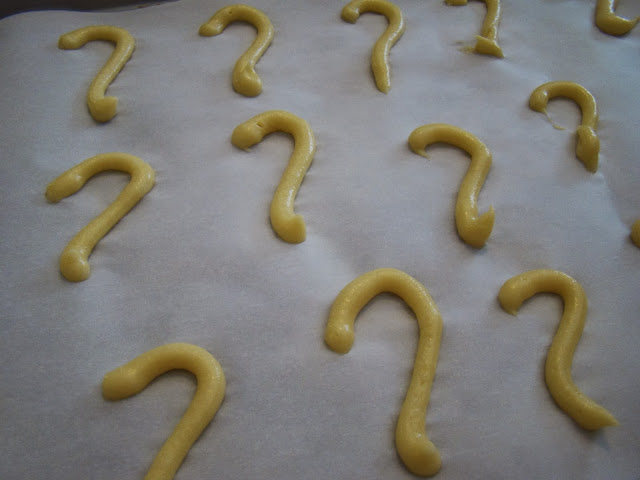
On Christmas Eve, I made the profiteroles and the Chocolate Sauce (sorry, this is a near and dear recipe that I don't share, so no to the Chocolate Sauce request).  I even mocked up a swan (pictured top left) so I wasn't truly winging it, no pun intended, during Christmas dessert.

On Christmas, with the help of my son C, 11, and his cousin A, 13, (I like to include kids in the process), I prepared an order form in advance and A simply asked each diner if they wanted 1 or 2 profiteroles and she just had to circle the number.  She asked what flavors and placed checks in the boxes.  The options were Peppermint Stick, Chocolate, and Vanilla.  Then she asked if they cared for Chocolate Sauce and circled Y or N.  11 for 11 on the Chocolate Sauce!

I needed the dinner plates washed in order to reuse them.  Like I always say the difference between a dessert on a dinner plate or a salad plate is $5!  That was in the works, while A tracked down the orders.  I laid out the plates so they were ready.  Then once the order sheet came in, I cut the tops off of the profiteroles and cut the tops in half.  I also laid out the number of necks I needed for each plate.

I placed a pool of chocolate sauce on the plate, scooped the ice cream flavors, assembled the swans and dusted them with powdered sugar.  C served each person once each plate was done.  Everyone loved them.  I served the 3 of us last and I can tell you a custom ala minute dessert was a hit with everyone!
Yorkshire Pudding

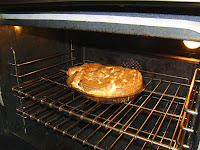
If you haven't eaten this, you must.  If you haven't made this, you must!  It is the most awesome food.  For Christmas, I prepare different meals from year to year, depending on who is coming, but Yorkshire Pudding is always part of the fare.  This is a very simple to make dish and is just spectacular to watch in the oven.

As a child, on Christmas, my mother made this and invariably we would hear hooting and hollering in the kitchen and all go running to see what the commotion was about.  There she was peering into the oven laughing at the Yorkshire Pudding.  It leads you to believe it's alive in there.

Once I hit high school age, I was in charge of the Yorkshire, so that would put me somewhere around 40 years in the making.  By that point, we all had big appetites so I always made 2 which was time consuming, but they always got eaten.

When I serve dinner now a days, I make sure to give the kids a sample of the Yorkshire (for short) and they always love it!

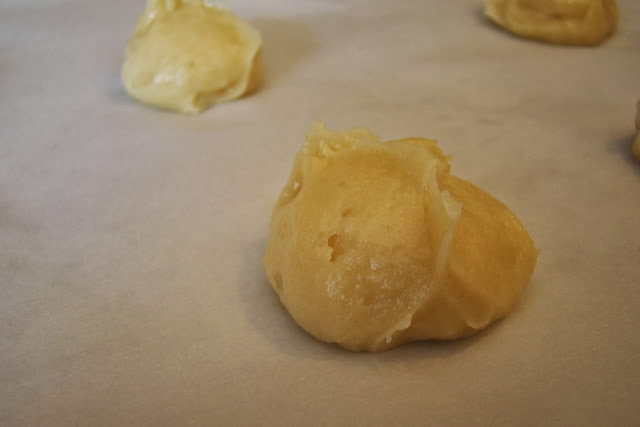
I am going to make it tonight again and will photograph it;  I was just too busy yesterday.  But here is the Yorkshire Pudding Recipe and now the photos have been added.

Preheat oven to 425 with rack in the center (or if using the oven for meat, as soon as it comes out, turn up the oven).  Bake the Yorkshire while the meat rests and is carved.

Add either 2 TBL of drippings from your roasted beef ~ OR ~ add 2 TBL of Light Olive Oil to a pie dish.  Swirl it to coat the bottom.  To a bowl, measure 1 Cup Flour and 1/2 tsp Salt.  To a measuring cup, Add 1 Cup Whole Milk and 2 Eggs.  Give the eggs a stir to break up yolks.  Add the liquid to flour and beat until smooth, about 1 minute or so.  Pour into the pie dish and immediately place in the hot oven ~ by itself.  It will take about 23-25 minutes to bake but begin to check on it without opening the oven after 18-20 minutes.  It won't look like much until that point but you will be amazed.  Once it is a dark golden brown, it's done.  Let it cool for a few moments to set up before cutting.  Using a bread knife, cut into wedges.  The more people the smaller the wedge, but I guarantee, there won't be any left. 

Sunday, December 22, 2013

Gale Gand's Butter Cookie Dough (perfect for cookie cutters)

I bought the giant tree and snowflake cookie cutters years ago from Williams and Sonoma.  I also have a reindeer but he is trickier to cut and is very fragile when decorating.  I just love watching kids decorate the big cookies!!  I have added some of the smaller shapes over the years and always cut hearts where I have little bits of space on the dough.

In the next few minutes, a niece and nephew will be here to decorate.  I felt I should bake the cookies before their arrival so they'll be cool.  They are only 2 and 3 years old and will likely loose interest and I wanted them to return home with some of their handy work.

Well, I was wrong, they hung in there until we were done.  The 2 year old, W, loved working with the gum drops and the M&M's.  The 3 year old, K, loved the sprinkles and wanted no help.  Big sister, A, kept things moving along.  And of course my son, C, had a blast just having company.  While the cookies dried, we played Candyland together and then played with the Thomas Trains while the older 2 built Mousetrap.  I love the holidays, where we just "do stuff."  We had a wonderful afternoon together while Mom got a shopping errand done!!

This dough, when rolled out thick, and accommodate a stick.  Recipe soon, otherwise head to the Valentine's post with the heart shaped cookies on a stick.

Friday, December 20, 2013

The story of Christmas...Fresh Cabbage turned into Cole Slaw

My tennis team adopts a family each year during the holidays.  This year I got to work directly with the mom/wife.  Her husband grows an incredible garden each season and he gave me a few HUGE cabbages from their winter garden as a token of their thanks!  Isn't that cool?  And aren't these beautiful?

The night I received them, I was roasting a Pork Loin in the oven and decided to make Cole Slaw to go along with it.  Not having a recipe, I made up a cole slaw dressing. 

First, I removed the outer leaves working with the tender lighter green leaves since it was going to be eaten raw.  Next, I removed the stem so I could fill it with water to rinse the leaves.  I turned it back stem side down to let it drain. 

Using a Bread Knife, I cut it in half which further allowed the water to run out.  So beware you have to clean it up because it holds a lot.  I used one full 1/2 Cabbage to make 6-8 side portions of cole slaw.  Using the bread knife, I cut thin slices, creating shreds.  I grated 1 Large Carrot and thinly sliced 1/2 Cup Red Cabbage that we happened to have on hand.  All of this was placed in a wooden bowl. 

Next, the cole slaw dressing.  Using a 2 Cup measuring cup, Add 1/2 Cup Olive Oil.  Add 2 TBL Rice Vinegar and 1/4 Cup Apple Cider Vinegar.  Stir in 1 tsp Kosher Salt and 2 tsp Sugar.  Using a wire whip, add 1/4 Cup Mayonnaise and 1/4 Cup Sour Cream.  Stir to combine and season with  Pepper and Celery Seed to taste.  Add more Salt, Mayonnaise or Sour Cream if needed.

Once you have the flavor the way you want it, pour 1/4 Cup of dressing onto the cabbage mixture and toss well before adding more.  The cabbage should be coated well but not swimming in dressing.  Serve at once for a delicious cold side dish/salad.  The cole slaw may be kept in the refrigerator for a few day already dressed.  I would tend to make what is going to be eaten and make it again.  The dressing can be kept for weeks in the refrigerator.

When I saw the Mom the next day, I gave her a jar of the dressing so she could make cole slaw for her family.  Enjoy and consider adopting a family one year, too!


Saturday, December 14, 2013

Salmon, Scales on, Cooked in the House

Every time I hear the word "salmon", it reminds me of an early episode of American Idol where Kellie Pickler was describing to Simon a dinner she had the night before.  She told him she a eaten saLmon for the first time, pronouncing the L.  He didn't quite know at first what she was talking about and finally he said something like, oh, salmon, saying it properly.  She looked at him dead serious and said you know there is an L in there.  It was too cute.

As my son says, moving on...
We have been cooking salmon more often than in the past and the main reason is that I have found a suitable way to cook it.  I have a previous post where I grill it and that is divine, but at times I don't want to mess with the grill.  I like my salmon just under done, firm but tender and ever so slightly, soft.  My husband wants his rare.

The first line of success is that we shop for 2 pieces of Salmon that are different thickness.  We always buy the salmon the day we are cooking it and I don't want any leftover.  The fillets should be firm to the touch, have relatively little to no smell, and be very bright in color.  The fish for dinner last night came from the Mandeville Seafood Market on Highway 59 and it was super fresh.  I think it was around $9.99 a pound.

For this preparation, I preheat the oven thoroughly to 350 and I preheat an empty pan over medium heat.  I rinse the fish and pat it dry.  I add a drizzle of olive oil to the flesh side of the fish and add S&P.
I begin with my piece of salmon.  I add it to the skillet, FLESH side down.  After about 4 minutes or so, and once browns, it will easily lift from the pan in 1 piece.  I turn it over now scale side down. 

At this time, I add the thicker piece of salmon to the skillet, SCALES side down.  I sprinkled dill on the the flesh side of both pieces.  I place the pan in the oven for 8-10 minutes depending on how thick it is.  While it is finishing in the oven, I thinly slice a lemon.  When I remove it from the oven, I place each piece of salmon on our respective plates.  I add 1/2 TBL butter to the fish and let it melt over the flesh.  Next, I layer the thin sliced lemon and sprinkle a bit more dill.  My husband likes capers so I add them at this time. I tent the plates with a piece of foil and let it rest for 5 minutes.

For this meal, I happened to have risotto that I made the day before and had that warming on the stove.  When we were ready to eat, I sprinkle my fish with a pinch of Hawaiian Black Salt that I bought this summer.  It was crunchy and really tasty.  I felt it complimented the fish well, you know, Hawaii & Salmon, a good combination.

NOTE:  If you both like the same doneness, just stick to one or the other preparation.  I hope you give this a try.  Salmon is a really great fish for a lot of reasons.  The nutritional value is superb. 

Monday, December 9, 2013

Tricia and Garth's Healthy Salad

My husband caught Tricia's new cooking show.  She and Garth were making a vegetarian salad together.  My husband decided since I was busy all weekend that he would shop and prep everything on Saturday and we would have this dish for dinner Sunday night.

He also decided since it was our dinner, that he would use her delicious salad dressing to baste Grilled Boneless Chicken Breasts.  I sliced them thinly and the slices were layered on top of the salad when served.  The cold salad, the wonderful salad dressing, plus the favor of the warm grilled chicken made a really good combination!

This was SO GOOD that I decided to add it to my blog.  When working on your menu's this holiday season, consider this tasty departure form the typical fattening fare.  It can be served as a lunch, brunch, or even as a dinner to make up for a heavy day of eating!

This recipe is a keeper and can actually be served at any time of year!!  Thanks Tricia and Garth!!

Recipe to come.

Sunday, November 3, 2013

Spider Cupcakes for Halloween

My son wanted to bring cupcakes to school on Halloween.  He checked out a book, that had all sorts of holiday treats, from the school library.  He zeroed in on a spider web with a licorice spider.  We agreed that the spider looked cool but the kids wouldn't like the flavor.  Instead we used a 1/3 length of Tootsie Roll and Chocolate Twizzlers to fashion a spider.  

I went to Michael's in search of a Halloween Cupcake Papers and found Martha Stewart papers on sale.  When I got home I was psyched because they are foil lined!  That means the batter doesn't bleed through like the cheap papers.

I knew cutting the candy would be time consuming, so I did it in the afternoon, while the cupcakes baked.  I always use the Martha Stewart ~ One Bowl Chocolate Cake, found on this site. 

After dinner my son and I did all the decorating.  I spread the Orange Cream Cheese Butter Cream.  I showed him how to make the webs by drawing 3 hollow circles, then dragging a toothpick from the center to the outside so he worked on that part.  It was my turn again and I placed the spider in place.  It took about an hour and a half.  We had a great time, just chatting and hanging out together, something we both enjoy.

I love delivering treats to school in a white bakery style box with a window.  When we were done decorating, we filled the box so it was all ready for the next morning.

After school he told me I was a big hit!  He even had enough to take some to his previous teachers.

Sunday, October 27, 2013

Skinny Cado

If you like avacado, you may want to switch from the smaller nubby Haas variety to the larger and slightly more expensive Florida Avacado.  It turns out, the Florida Avacdo has 1/3 less fat for the same size portion.  I feel it has a slightly milder flavor.   They are larger than the Haas Avacado, so you get more to work with, per piece of fruit.

I love to serve sliced Avacado when we have fajita night or if I am serving a dinner salad as a meal.  Also, when ripe, it is slightly firm so it holds up well.  I normally slice out exactly the wedges I plan to eat, leaving the seed in place to keep the fruit from oxidizing.  If you are serving it on a buffet, you can squeeze and lightly toss with either lemon or lime juice, to keep the color bright.  For storage, when I have only used a few wedges, I wrap it with plastic wrap, making sure the wrap touches the flesh to reduce or slow oxidation.  I try to eat it within a the first few days of opening it. 

I find that eating Avacado (in moderation) when serving lighter fare, keeps me from returning to the kitchen a few hours later.  The fat is considered a healthy variety because it is monosaturated, similar to why Olive Oil is considered a good choice over vegetable oil.

Pictured, I ate these 4 slices on a Oven Roasted Turkey sandwich on Wheat Bread.  I used about 1 tsp of Mayonnaise and a small sprinkle of Kosher Salt directly on the Avacado.  It was delicious!!

Saturday, October 12, 2013

Homemade Caramel

This recipe come from a dessert found in Gourmet March 1997.  The dessert is wonderful but I have been wanting to double the Caramel to have on hand for other uses.  My son has wanted me to buy prepackaged Apples with Caramel ($1 each) for his school lunch so I decided to make my own.

This is such a delicious caramel recipe that I hope you give it a try!  It's wildly fun to make.  It definitely falls into the category of "I can't believe I just made this!!"

For the purpose of just making caramel, this recipe is doubled and can easily be cut in half.  Do all the measuring first because you will not have time once you get going.
  • Measure 2/3 Cup Sugar directly into a thick bottom saucepan.  I use All-Clad.
  • Measure 1 Cup Light Corn Syrup into a 1 Cup Measuring Cup and have a rubber spatula set out.    
  • Measure 1 1/3 Cups Heavy Cream into a 2 Cup Measuring Cup.  
  • In a small dish, combine 2 tsp Corn Starch with 2 Tbl Water.  
  • Have at the ready a Candy Thermometer, a bottle of good quality Vanilla, and a measuring spoon.

First, place the pan with Sugar over moderate heat and stir with a fork until it melts.  This will take about 5-7 minutes.  At first, it will appear lumpy but as it melts it will get smooth.  Caution: IT IS VERY HOT!

Continue to cook without stirring and swirl the pan until it turns a golden brown color.  


Add Corn Syrup, scraping with the rubber spatula to get it all.  Boil over moderate heat, stirring with a wire whip until well combined.  This will take some effort.  Don't give up even though it looks like a lump of golden brown candy in the corn syrup.  Again, as it melts, it will combine to a smooth consistency.

Place candy thermometer in the saucepan.  Add Heavy Cream to caramel.  It will steam, so use a mitt for pouring.   Boil, stirring occasionally,  and cook until the thermometer reads 210 degrees.

Stir Corn Starch mixture into the caramel.  Boil for 1 minute, stirring with a wire whip, the entire time.  Remove from heat.  When caramel stops bubbling, add 1 tsp Vanilla.  As the caramel cools it will firm up but still remain runny.

Dip Apple Wedges into Caramel for a snack or dessert, top Apple Pie Ala Mode, serve warm on a Sundae Bar, or just ladle over Vanilla Ice Cream.  Either way, it's delicious and you won't believe you made it!!

Saturday, August 17, 2013

Sticky Garlicy Ginger Wings


Just in time for football season!  I just love wings during a football game!!  What I like about these most is they are made in the oven so they can be cooking with very little fuss and served at halftime.  My family enjoys the combination of garlic and ginger so I thought, why not put them together for a zesty and sticky honey glaze with an Asian twist and the results were great!

Have you noticed how sometimes you get wings that are not fall off the bone tender?  I created this recipe to ensure they would be fall off the bone delicious.  Many wings are fried and though I love hot wings done that way, it produces a ton of work since they are cooked in small batches AND makes an incredible mess.  Get the picture?  More work for Cinderella. 


First, in a Tupperware marinade container, make the marinade.  If you don't have one, use a 1 Gallon zip lock bag.  Combine the following:  4 Tbl Tempura Dipping Sauce, 2 Tbl Rice Vinegar, 1/2 tsp Sesame Oil, 1 Tbl Spicy Stir Fry Sauce, 1 Heaping Tbl Corn Starch, 1/8 tsp Red Pepper Flakes, 3 Tbl Honey, 1 Tbl Sherry, 1 tsp Toasted Sesame Seeds, 3 Pressed Garlic Cloves, 1 Tbl Fresh Grated Ginger.

Next, Rinse and using a boning knife, cut up 18 Wings.  BTW, these cost about $11. I threw away the first joint but you can leave it attached or you can save it to make stock.  Split the remaining wing into 2 drummettes as you can see pictured.  Place the cut wings in the marinade as you go.  Cover the container (or zip the bag). Turn over about every 20 minutes over a period of an hour.  I made a Napa Cabbage salad while these were marinading and it all went well together.  That recipe will be in a separate posting.
During the last 10 minutes, Preheat oven to 375.  Using heavy duty foil, line a sheet pan.  NOTE: Do not throw away the marinade.  Remove the wings and place in a singe layer on the sheet pan and place in oven.

Pour marinade into a sauce pan.  Add an additional 2 Tbl Honey and 2 Tbl Canola Oil and over medium heat, boil just around the edges.  While wings are baking, baste them about every 20 minutes with this sauce.  After 1 hour, don't baste anymore, reduce heat to 350 and continue to bake for an additional 20 minutes.  Get a platter ready and thinly slice Scallions for a garnish.  Remove from the oven and place on a warm platter.  Garish and serve at halftime!  Hopefully your team is up.

Deep Dish Pizza

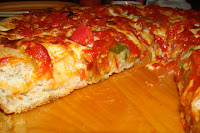
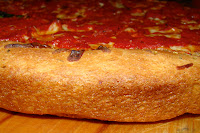
My deep dish pan was a gift from friends who came for a weekend stay more than 15 years ago.  I was told that when making deep dish pizza, I am to layer it in the opposite way of a regular pizza.  Toppings, Cheese, Sauce, so that is what I have always done.  This pan makes a large pizza that can easily serve 5-6 people
I have played around with how long I mix dough.  I finally just went for it, and mixed with my dough hook for 30 minutes.  The texture was especially tender.  You can see that it rose nicely and stayed that way through the baking process. 
Recipe to come soon.


Tuesday, July 30, 2013

Mushrooms Marsala with Fresh Pasta

This idea goes back a few years ago when I entered some sort of dish into a cooking competition.  That dish inspired me to make this dish.  The thought has been swimming around in my head and I am just getting around to making it for today's lunch.
Last week, I made pasta sheets for my Roasted Eggplant Lasagne and when I was done, I rolled the extra dough into sheets.  I have mushrooms in the refrigerator and thought it would be tasty to make Mushrooms Marsala and arrange the mushrooms on cooked squares of pasta to create a loose stack.  To top it off, I'll add a light dusting of Fresh Parsley and Parmesan Cheese.
This is my recipe for Mushrooms Marsala.  Get a large pot of water on high for cooking the pasta.  If you are using dried lasagne sheets, cook them before cutting them into squares.  Of course, you can always serve this over a dried pasta shape of your choice.  And better yet, if you make pasta, then my all means make some.
First, wipe clean and slice thinly, 1 Pint of Bella Mushrooms.  In a small bowl, stir 2 Tbl Corn Starch with 1/4 Cup Beef Broth.  NOTE: For vegetarian, use Vegetable Broth.  Measure out 1/2 Cup Marsala Wine.
Heat a large skillet over medium high heat.  Add 1 Tbl Olive Oil and 1 Tbl Butter.  Add mushrooms and saute them quickly.  Deglaze the pan by stirring in the 1/2 Cup Marsala Wine and continue cooking for about 2 minutes.  It should bubble and appear to make a glaze.  Add the corn starch mixture.  Add beef broth until you have used a total of 1/2 of the can, you can add more if needed but do so slowly.  Season with S&P.  Continue to let the sauce cook, allowing it to bubble gently for another 4-5 minutes.  Turn off heat and add 1 Tbl Butter and swirl the pan after it has melted.  Cook the pasta either now, if fresh, or while you are making the sauce.
Layer the pasta and Mushroom Marsala Sauce on a warm plate and top with Parmesan Cheese and Finely minced Fresh Parsley.
I edited the sauce to result in a thicker sauce than what is pictured.  I liked the flavor but the sauce was slightly thinner than what I was going for. 

Thursday, July 25, 2013

Roasted Eggplant Lasagne

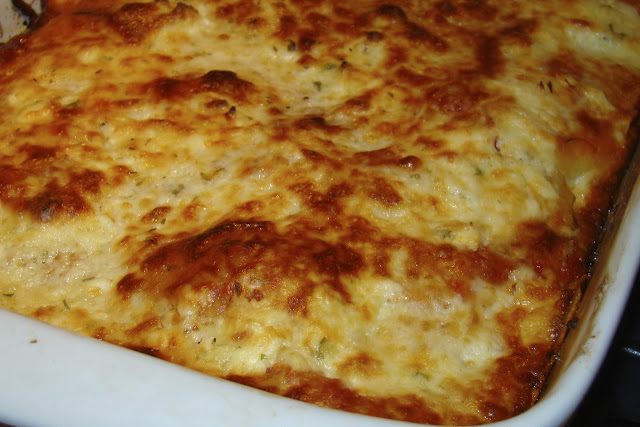
I created this recipe in my head at least a few weeks ago and finally made it for dinner last night.  We all thought it was delicious!!  I used the Feta Cheese Filling I had in my freezer (recipe on this site).  But you can season a mixture of ricotta and mozzarella cheese for a short cut.  I already had some Marinara made as well, so that made life easier for me. I made my own pasta sheets while the Eggplant was roasting but you can use the no-bake sheets available at the grocery. NOTE:  I made and photographed a triple layer lasagne and I could've made it 4 layers.   Next time I will.  This recipe is for 4 layers.

If you are making your own marinara, make that first.  You will need about 3-4 cups total when using fresh pasta.  For dried pasta, you will need to add a bit of water to the lasagne so the pasta doesn't dry out the lasagne. 

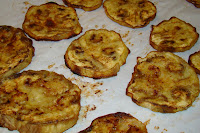
Preheat oven to 300 for convection, otherwise 325.  Line 2 sheet pans with parchment paper for simple cleanup.  Next, Peel and Cut to 1/4" slices, 3 Medium Eggplants.  Brush each side generously with Olive Oil.  Season with S&P and place in oven.  After 20 minutes, flip the eggplant over and if it looks dry, brush with additional olive oil.  Rotate the pans and cook for the remaining 20 minutes, 40 minutes in all.  Remove from the oven when golden brown. 

While eggplant is roasting, get everything set up.  If you are making pasta sheets, get them done and cut.  Mix 8 oz Ricotta Cheese with 2 Cups Mozzarella Cheese.  Add 1 Egg Yolk, 2 tsp Dried Oregano (for Fresh 1 Tbl), 2 Tbls Fresh Parsley, 1 tsp Basil (for Fresh 2 Tbl), 1 tsp Kosher Salt, 1/2 tsp Pepper.  Stir gently until just combined. 

Preheat Oven to 375.

Butter a deep 9" X 12" Lasagne Dish.  Add a few Tbl of Marinara to the bottom of the dish and using the back of the spoon, spread around.

Add first layer of pasta.  Using about 1/3 cup of marinara, lightly coat the pasta.  Add 1/3 of the cheese mixture in small mounds, it doesn't have to be perfect, and spread with an offset spatula.  Layer with Roasted Eggplant.  Top with 1/3 Cup Marinara.  That is layer 1.  Repeat 2 more times.

For the final layer, top with pasta.  Generously top with marinara covering the pasta and add 1 1/2 Cups Mozzarella Cheese.  Drizzle with Olive Oil and sprinkle with Dried Oregano.

Cover with foil and bake for 30 minutes.  Remove foil and bake for an additional 12-15 minutes until bubbly and deep golden brown.  Remove from oven and let rest for at least 10 minutes before cutting.  Everyone will begin to gather in the kitchen and claim to be hungry, but let it rest for at least 10 minutes, regardless of their whining.

For serving, add marinara to the plate.  Place a square of lasagne on top of the marinara.  Serve at once with Crusty Bread and Olive Oil and an Italian Red Wine.  Buon Appetito!!


Wednesday, July 24, 2013

Homemade Mozzarella

My sister, D, gave her daughter a cheese making kit a few years ago and they have been making Mozzarella Cheese from scratch since.  I finally bought a kit and am going to give it a go.  I am really excited and hope you are, too! 
First step is to find "Pasteurized Milk" since I can't use Ultra-Pasteurized Milk." I found the grocery about a mile from my house sells pasteurized whole milk, so I bought it yesterday.

Yeah!  This morning I made the cheese.  First I had to watch a video a number of times because there are critical steps of stirring, timing, and temperature to be mindful of.  The kit I have is from Ricki Carroll, about $25 online.  It will turn 40 gallons of milk into cheese.  Each gallon makes about 16-20 ounces of finished cheese, though that is a rough estimate without weighing it.  If you venture into this, you will find that you work with One Gallon of Whole Milk at a time.

Pictured is the finished product ready to eat.  Next time I know to pull the cheese more times than I did to make it more elastic and therefore more stringy.  I also learned to have an ice bath ready so once the cheese is formed to my liking, I have it ready.  My first two balls were still warm and flattened as they cooled on a plate.  I decided to eat one of those "mistakes" first.  All in all, it took me longer than the 30 minutes but next time will be faster.  And all and all, it is delicious!!

Monday, July 15, 2013

Fried Calamari

Recently, my husband went to an Asian store near New Orleans.  He picked up the ingredients for a Japanese dinner.  We brought out our rice cooker purchased specifically for Nishiki Rice.  He rolled some California Rolls and we cooked potstickers (which they sell frozen) and taste nothing like the ones I make from scratch.  While he was at the store, he asked about buying squid.  They carry Frozen Squid, 3 to the package, for about $10.  He brought them home, watched some videos over the past few days, and yesterday he prepped them.  He gave one to me for making fried calamari.

Over the years, I have said to get good at making something, you have to prepare it at least three times.  I was out on a limb, venturing into this, so I'd say for a first time go, I'd give myself a B- but we both learned a lot.

He wanted to make calamari salad, so he cooked 2 of the squid, cleaned, but with the skin on.  After two minutes in a rolling boil, he cooled them in an ice bath.  The skin came off easily and the calamari was quite tender, more so than mine.  

For mine, he did the cleaning.  There's the whole bit about removing the head; though he removed the ink sac (for lack of a better word), we didn't extract the ink for use, though you can.  Then it was skinned and the teeth removed from the tentacles.  Pictured is his handy work after the fact.

I read not to cook them more than 2 minutes or they will be tough.  I think for frying, it's more like 45-60 seconds.  That means the oil really needs to be at  360-375 for "flash frying" purposes.  Next time I will measure the temperature because they were not as tender as I would like.  Also, based on the size of the tentacles, we need smaller squid.

While I heated oil for frying, I prepped Panko Bread Crumbs by crushing them further using my meat tenderizer.  To them I added, Parsley, Paprika, S&P.  Working in small batches, I pressed the calamari rings into the crumbs and then placed them in the hot oil and cooked until golden brown.  I added additional salt as I pulled each batch out.

I think they should be eaten as they are cooked.  I put them on a cooling rack lined sheet pan in the oven heated to 250...wrong thing to do.  Just eat them while hot with zesty marinara for dipping.

Be sure to dispose of the oil right away, in fact, I encourage you to make these on a night the trash is going out.  All in all, I look forward to trying this again.


Friday, July 12, 2013

Butterflied (or Butterfly) Potatoes

I am grilling Rib Eye Steaks tonight.  I plan to slice them since they are thick.  I am cooking what my mother used to call "Butterflied Potatoes".  These can be made with any variety of potato that lends itself well to roasting in the oven.  Here is the recipe for Butterflied Potatoes.

Preheat oven to 375.  Cut 4 Large Red Potatoes in half.  Place cut side down and without going all the way through to the bottom, slice each one at 1/4" intervals.

Place the potatoes in a glass dish and drizzle each with 1 tsp Olive Oil.  Sprinkle with S&P to taste.  Add 2 Tbl butter to dish.  Place in hot oven for 40-50 minutes depending on how big your potatoes are.  Every 10 minutes or so, baste each potato with the olive oil/butter mixture.  This will open up the slices of potatoes, like a butterfly.  This dish never fails to take me back to my childhood days, when Sunday dinner was served at 1pm.

Thursday, July 4, 2013

White Chocolate Ice Cream

If you follow my blog, you know by now, I really like White Chocolate.  Yesterday I collected the ingredients I need to make White Chocolate Ice Cream.  Today we are going to make White Chocolate Ice Cream With Strawberries.  My ice cream maker has an opportunity to add fruit before the ice cream gets too hard.  Though I was going to buy raspberries, I have strawberries on hand, so I'll use them.

This recipe is in my homemade cookbook which is a random collection of cut out magazine recipes, so I don't know what magazine it comes from.  There is a note that whoever published it does mentions that it came from their friend, Lee Klein.  So based on that, this is Lee Klein's White Chocolate Ice Cream Recipe.

Last time I made Ice Cream, it was too thick, like a pudding, and when served it was like a frozen pudding and as it melted it didn't seem like ice cream.  I cooked it until it coated the back of a spoon but I think I got to that state too quickly because the mixture was cooked at too high a temperature.  It's been a while, but hopefully this one will work out this time.

Ok, I made the ice cream and added strawberries.  It tastes very good and looks to be the right consistency.  This recipe called for it LIGHTLY coating the back of the spoon and I know when I made it last it was too thick.

Here's the recipe.  Set up a double boiler.  I used a glass bowl and a pot that it fit into snuggly.  Add enough water to the pot so that the bottom of the bowl touches it.  Bring the water to a simmer.

To the bowl, add 1 Cup heavy Cream, 1 Cup Whole Milk, 1/3 Cup Sugar, 1 Pinch of Salt and 4 Egg Yolks.  Place the bowl over the simmering water and stir until the custard gets hot and begins to thicken.  When you dip a wooden spoon into the custard, it should lightly coat the spoon and leave a clean trail when you draw a line through the custard.  This may take 4-5 trys until you are satisfied with the consistency.  Remove the bowl from the pot. 

Transfer to a clean cool bowl and stir in 4 oz White Chocolate and 1 tsp Vanilla.  Once it becomes smooth, place ice in a larger bowl and set the smaller bowl with the custard into the ice.  Stir with a wire whip while the custard cools.  Once cold, stir in 1/3 Cup Buttermilk and 2 tsp Fresh Lemon Juice.

Place the custard in your ice cream maker and turn it on for 20 minutes.  I have a simple 1 speed Cuisinart model and it worked just great.  If yours is like mine, you can add ingredients to the ice cream.  I added 6 Cut up Strawberries after the first 10 minutes of freezing, but note, the pieces have to be small.

The custard will not completely freeze but will be well on it's way.  It needs to be transferred to a container and placed in the freezer.  You can see by the picture what I chose.  In order to get hard, the ice cream needs to freeze for 4-6 hours before serving.  

Hope you get a chance to make ice cream this summer!


Tuesday, July 2, 2013

Bacon and Shallot Crusted Pork Loin Chop

This was a simple preparation and results were delicious.  Buy 1 Boneless Loin Pork Chop per Person - at least 1 1/4" thick.  I bought 3 chops and had extra bread crumbs, so these quantities will work for 4 chops.

Making the coating: This part can be done in advance.  Finely mince, 2 Strips of Applewood Smoked Bacon, you can buy just 2 strips in bulk at a good grocer and even though the butcher will raise an eyebrow, don't pay any attention to him or her.  Saute the minced bacon in a small skillet over medium heat.  While it begins to cook, finely mince 1 Small Shallot and add it to the bacon.  Continue cooking until it is a light golden brown. Note: this mixture will continue to cook as a coating, so it should be under done.  Turn off the heat and add to it 1/2 Cup Panko Bread Crumbs, 1/4 Freshly Ground Pepper, 1 /2 Tsp Parsley, Salt if you feel you need more

Getting ready to cook:  Preheat the oven to 350.  Take Pork out of the refrigerator about 30 minutes before cooking.  Preheat an oven proof skillet over medium heat.  Add Olive Oil enough to lightly coat the bottom. 

Ready to Cook:  This part takes about 30 minutes depending on how thick your chop is.  Note: if your chop is closer to 1" thick, preheat the oven to 375 and cook for less during that step.  Spread a 1/2 tsp Stone Ground Mustard to the top side (ONLY, not the sides themselves) of the chop.  Press into the crumbs.  Lay crumb side down on a plate and repeat with other side placing the chop directly into the skillet as you go.  Press the crumbs into the upward facing side so they really stick to the chop.  Immediately wash your hands when done.  I use mustard in a squeeze bottle.  If you are spooning it out of a jar, put desired mustard into a small bowl as to not contaminate the jar of mustard. 

Finishing off in the Oven:  When the first side done, the chop will release easily from the pan.  This will take about 5 minutes.  Once it's turned, place skillet in the oven for finishing.  My chops were about 1 1/2 " thick so I let them cook for about 20 minutes.  When they are done (and don't over cook them) they will feel firm but not hard.  Remove them from the pan and onto the plates or a serving platter.  Let them rest for 5 minutes before serving.  I simply add a small piece of foil to each plate and loosely wrap 2 of the corners.

LAST NOTE: When handling the chop once coated, handle it with tongs by the side or the coating you pain stakingly created will fall off.

I served these with Fresh Corn on the Cob, Sliced Garden Tomatoes (from my in-laws), and a Warm Crusty 5-Grain Boule.  What a satisfying summer dinner!!

Sunday, June 30, 2013

Fresh Roasted Beet Salad

I just got back from NY/NYC.  Three times while there, I ordered a first course with Fresh Roasted Beets first from the Culinary Institute of America then at two different restaurants in NYC.

At one NYC restaurant, roasted golden and red beets were cut in wedges and served cold in a neat bowl.  On top was a generous amount of tender greens that were tossed in olive oil and an acid of sorts.  Throughout the dish there were small spoon fulls of goat cheese coated with pumpkin seeds.  The combination was really good and perfect for summer. This dish closely resembled what I ordered at the CIA.

At the second NYC restaurant, they were served in a more artistic manner on a flat rectangular plate.  The red beets were cut into chunks and were also served cold.  There was a smaller amount of greens as compared to the salad presentation I ate previously, and this one included sauteed scallions.  The greens too were coated in a light oil and acid dressing.  Interestingly, the goat cheese compliment also included sunflower seeds.

The first thing I bought when I got home was fresh beets and goat cheese.  I am going to try to recreate the dish that I enjoyed so much.  I have white truffle oil and champagne vinegar that I bought at Oil & Vinegar and I think those will work well.  I still need to get the sunflower seeds and some sort of small tender greens or micro greens.  This should be a fun dish to prepare. Here's my Roast Beet Salad recipe.

If you roast the beets in the morning, they'll be chilled by dinner.  Preheat the over to 325.  Peel about 1 lb. Fresh Beets and cut into similar sized pieces, about 1/2" squared.  Toss in Olive Oil and place single layer on a sheet pan.  Roast for about 45 minutes, turning them over a few time for even roasting. Let cool, the chill in a paper towel lined bowl.  I bought about .10 lbs of sunflower seeds that I found sold in bulk.  That is plenty for this use.  I sauteed them in 1 tsp Butter stirring the entire time, until golden and crunchy.  Let cool.  Rinse and spin the desired amount of greens, I used two handfuls for 2 of us.  I used a combination of Fresh Spinach and tender Spring Mix.  Note, my presentation was more of a salad.  Place the greens in a bowl.  Toss with about 1 Tbl White Truffle Oil and 1/2 tsp Champagne Vinegar.  Season with S&P.  You can buy these specialty items by the 100ml at Oil & Vinegar or a shop similar, they are popping up all over the place.  It's worth it to visit one of these shops, because you get excellent combinations of flavors.

Time to assemble.  Add the greens to a flat plat.  Add the desired number of beets.  I used roughly 2-3 oz Goat Cheese.  Take small spoonfuls of the cheese and form it into a round shape and dot with the sunflower seeds.  These are not meant to look like balls though.  Add the cheese to the salad.  Add a few drops to Olive Oil to the goat cheese.  It helped take away some of the sharpness of it.  Another trick would be to lighten the goat cheese by whipping it with some cream cheese.  Once assembled, eat right away!! 

The other ingredient that was neat on one of the salads was the addition of Sugar Snap Peas.  I will add these to my next try at this salad.  The stem and string on one side was removed and they were blanched perhaps for 45 seconds, so they were cooked but a very bright green.  They were sliced open to expose the tiny peas attached to the pod.  Both sides of the pod were used and added great color, flavor, and a nice crunch.  I'll photograph the salad made with these once I make it. 


I hope you like this salad.  With the ingredients I used, it seemed quite similar to what I ate. 

Sunday, June 2, 2013

Grilled Chicken and Vegetables on Rosemary Skewers

This is already on my blog but I wanted to add a new photo.  My in-laws joined us for dinner last week.  I sent my son to my mother-in-law's an hour before their arrival to cut the rosemary skewers for me.  I find that the thinner stems work best because if they are too thick they snap the peppers and mushrooms.  I crowd the food a bit so the skewers don't burn apart leaving me with small pieces.  Once cooked, I still want whole skewers. We served this with a salad which my mother-in-law brought, fresh corn on the cob, roasted new potatoes, and warm crusty bread.  For dessert we had brownies topped with vanilla ice cream and warm homemade chocolate sauce.  It was a wonderful dinner and we had a great time together!!

Rack of Lamb

I was prepared to grill loin lamb chops yesterday to go with roasted onion and rosemary laden baby new potatoes, but only found Racks of Lamb.  I love racks but wasn't in the mood for cooking them and really wanted to grill chops since it's so hot right now.

I pulled together this simple preparation after looking at what I had on hand and it turned out
well and was really delicious so I wanted to share it.

Set 2 Racks of Lambs (Serves 4 people, 4 chops each) on a paper towel lined dish in order to absorb excess juices.  Preheat oven to 350.  Heat an oven proof skillet over medium heat.  Salt and Pepper the fat side and place the racks in the pan, fat side down.  Sear for about 5-7 minutes.  While it is cooking, rough cut Fresh Rosemary and thinly slice 1 Shallot, then cut the slices into quarters.  When the lamb releases from the pan, it will be easy to lift.  Turn them both over, now fat side up, and add additional Salt and Pepper and the Shallots and Rosemary.  Place in the hot over for 20 minutes or so depending on their size and your done-ness.  I like lamb to be just medium, no more, no less.  You can tell the done-ness by pressing the meat.  It will stiffen up as it cooks so if it's really wiggly, it's more likely rare to medium rare.  Best to check it a few times than to have it over done because it can become dry.

When it's to your liking, remove from the oven and lightly cover the pan with a piece of foil being sure NOT to secure it tightly.  This will allow the meat to rest and retain the juices when carved.  After about 5-7 minutes, carve between each bone resulting in 8 chops per rack.  Enjoy with roasted onion and laden baby new potatoes.  The rosemary is optional!