Showing posts with label Gluten Free. Show all posts

Tuesday, July 28, 2020

Scratch Made Marshmallow

I decided to finally give these a try!!  What a cool recipe.  I watched an episode years ago when Ina Garten made these for a hot chocolate gift she was making for friends.  I bought gelatin but never attempted the recipe.  Now, possibly 4-5 years later that I bought gelatin again and finally decided to make marshmallow in order to have a little fun using it.  I used Alton Brown's recipe only because making marshmallow seemed more like a chemistry experiment and he is all about the science.  It's a precise recipe as I looked up Ina and she uses the same ratios as Alton. 

NOTE:  This recipe is not for kids!! 

There are a few steps you should do in advance to minimize running around by being set up in advance.  Since this is candy making being a thermometer is involved, there isn't time later.  

First - Bloom the Gelatin.  To the bowl of your mixer, add 1/2 Cup Ice Cold Water.  Add 3 Packs fo Gelatin (3/4 oz).   Let that sit.  Have your wire whip ready.

Second - Prep a 9" x 13" pan.  Spray the bottom and sides lightly with spray Canola Oil.  Sift 1/4 C. Confections Sugar mixed with 1/4 C. Corn Starch.   Generously, add most of it to the bottom of the dish.  Cover with foil and shake excess to coat the sides.  If you need, more, repeat.  

This is a video after about 8-9 minutes.

To a small saucepan, add, 1 1/2 C. Sugar, 1 C. Corn Syrup, 1/2 C. Water and 1/4 tsp Kosher Salt.  Place over medium high heat, COVER, and cook for 3-4 minutes.  The sugar should be (mostly) dissolved.  Add a candy thermometer to the side of the pan and cook until it reaches 240.  I stirred a few times.  

With the mixer on low, and while it's running, slowly add the sugar mixture into the gelatin, pouring only down the side of the bowl.  Continue until it's all combined.  Turn the mixer to high and mix for 13 minutes.  Add 1 tsp of good Vanilla and mix for another minute but no more than 2.  

This is a video after vanilla was added.

Pour the sticky mixture straight into the prepared dish.  Dust the top with the Sugar/Corn Starch Mixture and let cool anywhere from 4 hours to overnight.    Turn out into parchment paper or cutting board for cutting.  

Have fun with what you do with it!  


Wednesday, October 23, 2019

Zucchini Lasagne (Inspired by Rachel Ray)

I always get a new dish idea each time I watch Rachel Ray.  Her cooking is a simple style to make and is always tasty!  I tape the show daily and when I have time, I scroll through the guest lists.  Tim Tibow was on recently.  He has been following a Keto diet for years and this dish falls into that category.  Simply put, he explained he eats meat and good fats but avoid carbs and sugar.  BTW, he looks awesome.  I'm not on the Keto diet, or any diet for that matter, but this dish looked perfect for me and my family.  It also looked perfect as a reheated leftover.  On days my son has to work directly from arriving home from school I love to have things like this in the refrigerator.  It affords him to a real meal before work since he works the dinner shift. 

I only saw the dish made and didn't pull up the recipe so it isn't Rachel's verbatim but close enough.  You can go to her show's website and see exactly what she did.  She didn't use Marinara in her meat and I added it because the acid of the tomato balances the fat.

This made 8 zucchini halves allowing 2 per person.  The ratios I selected worked perfectly.  If you feel you want some carbs warm crusy bread comes to mind.  For a Vegetarian version, roast in Olive Oil, Sliced Mushroom, Wedges of Red Onions, 1/2" Diced Bell Pepper, and 1" Cubed Eggplant for about 20-25 Minutes in a 350 degree oven tossing very 6-8 minutes - obviously omitting the meat.

I bought 4 Medium Zucchini on the plumb side.  Preheat oven to 350.  Rinse and cut off both ends and slice down the middle.  I used my melon baller to scoop out the seeds creating a well.  Don't go all the way to the ends so nothing can fall out.  Place on a sheet pan and brush with Olive Oil, sprinkle with Salt and Pepper and Roast for 15-20 min till sizzling.  Set aside when done.  


I used 1.25 lbs of Ground Chuck.  Add 1 TBL of Olive Oil to a skillet and heat over medium heat.  Dice 1/2 small Onion.  Sweat the onion til it glistens - about 3 minutes.  Add meat and cook lightly, breaking it up but keep it chunky so it doesn't resemble bb's.  Because it is going into the oven, don't cook it throughly to prevent it drying out completely.  Season with Salt & Pepper to taste, 1/2 tsp Oregano and 1 TBL Fresh Parsley.  I had fresh made Marinara on hand.  Add about 1/2 Cup Marinara and stir to combine.  Turn off heat.  


This is the good part.  In a saucepan over medium low heat, melt 4 Oz Mascarpone in 1/4 Cup of Heavy Cream, stirring the entire time.  It will make a nice smooth sauce.  Remove from heat when smooth.  

Make sure the zucchini are close together.  Top each one til almost overflowing.  Top with the white sauce.  Using 8oz Mozarella Cheese, top each with cheese.  Then Dizzzle with a tiny bit of good Olive Oil and sprinke with Oregano.    

You can assemble up to this point.  You can even make ahead and refrigerate overnight.
If you do that, remove from refrierator while the oven is warming.  

So when ready, preheat oven to 375.  Add pan to the oven and bake for 20-25 min.  I wanted the mixture bubbly and the cheese browned so I switched to a convection broil for the last few minutes.  In any event, stay close by so you don't over cook this.  

The zucchini was still al dente while the filling was warm and bubbly.  This was a delicious meal.  I can see making it as a group for a large family gathering, it's very forgiving.  Like I said, it can be made in the morning or even the day before.  Perfect for a snowy winter dinner with warm bread and a glass of Chianti!  

Other options, you can make baby versions using baby zucchini and serve 1/2 as an appetizer or serve a platter of them on an hor's doeurve table. Want to reduce calories, use ground chicken.  An absolutlely perfect recipe!!

Thursday, May 16, 2019

Hor's Douevre Platters

I follow Cheese by Numbers on Instagram.  I know her posts look so simple but it's actually harder than it looks.  So while I practice one of my latest happy hour bite platters, I'll post them, mostly so I recall what I've done.  I bought this cool looking platter for about $15 and love the size and shape!  It can be dinner for 2 or a platter to serve many with drinks ahead of dinner. 

Below is a simple pre-dinner platter using a dinner plate.  We have a new media room and I made this one night while we enjoyed a cocktail.

Monday, May 13, 2019

Fruit Tarts

I had a hankering for individual fruit tarts that I made years ago for Christmas desert.  I searched my blog and didn't find a thing.  Then I searched my kitchen book (where I write menus of past events) and again came up empty.  After looking at a few cookbooks, I still couldn't find a recipe that I might have used.  After that, I decided to wing it a bit.  

I have 6 individual tart pans that are a perfect size.  

First I made the dough and baked the shells.  In a food processor, combine 1 Stick Unsalted Butter (cut into cubes) with 3 oz Cream Cheese.  These can both warm up for about 15 minutes so they are cool but not soft.  To this add 1 tsp Sugar and 1/2 tsp Salt.  Add 1 Cup Flour and blend until a ball is formed.  No not over mix. 

Preheat oven to 350.  Divide the dough into 6 pieces.  Give and take until they look about even.  With floured fingers, gently press dough into the tart pans so the dough along the sides is fairly even.  Know that the dough will stick into the corner so press there and up the sides.  It's pretty forgiving.  Pierce with a fork along the bottom.  Place into hot oven for about 18 minutes until golden brown (and fragrant).   Remove from oven and let cool.

To make the lemon curd, to a bowl, add 3 Egg Yolks and beat til pale yellow.  Add 3 TBL Fine Sugar and beat until ribblons form when removing the beaters.  Zest 2 Lemons straight into the bowl.  Juice the 2 Lemons and beat in 2 TBL of the juice (taste to see if you want more and add accordingly.)  Place the curd in a small pan and while stirring continually, heat over low heat until it warms through and is thick.  Once it's resembles smooth pudding, remove from heat and put the curd in a clean bowl to cool.  

NOTE: For fine sugar, beat granulated sugar in a food processor.  I prepared a 1 LB bag of Sugar for my various needs and I store it in the bag it came in.  You can buy Caster Sugar but it's very expensive. 

To this point, all of this can be made ahead.  Assemble when you are ready to serve.  Place a tart pan on a plate and top the shell with curd.  Add fruit of choice and serve at once.  It's a delicious dessert any time.

For GF use GF flour when making the shells.


Sunday, December 16, 2018

Barbeque Shrimp meets Sushi

Using Pinterest, I saved a picture of something like this but when I went to review the recipe I got an error message.  This past Thanksgiving, while in the Outerbanks, we had an Asian inspired night and my sister, D, made something similar to what I had previously pinned.  

I hosted a party last night and did a mix of the 2 things I had in mind knowing all the while I would be blending the ingredients with New Orleans style Barbeque Shrimp seasoning.

This recipe made 20 stacks.  Cook 1 Cup Nishiki Rice as directed on the package.  Once done, place it into something like a large flat bottom bowl or platter so it can cool.  I like to use a flat bottom wooden salad bowl in order to give me a lot of surface area.  Dress the rice for Sushi sprinkling the following: Mix together 1 Tbl Rice Vinegar, 1 1/2 tsp Sugar, 1/2 tsp Salt.  Using 2 forks lightly toss until the seasoning is combined with the rice.

Using a total of 3 Avocados, mash 1 1/2 Avocados and dice 1 1/2 Avocados.  Add the juice of 1/2 Small Lemon, Salt and Pepper and 1/2 Cucumber, peeled and seeds removed then diced.  Mix together gently.  Refrigerate until you are ready to assemble.

Cook the Fresh Shrimp (in my case I cooked 24 of them) over medium heat in 2 TBL Butter.  Once almost done, add the Juice of the other 1/2 Small Lemon, 1TBL Worcestershire Sauce, 1-2 TBL of your favorite Barbeque Shrimp Seasoning.  Toss to coat and turn off heat.  

To assemble, I used a tall 2" round metal timbale mold.  Using wet fingers, press 1 1/2 to 2 Tbl Prepared Rice to the mold.  Continue making the rounds until the rice is gone.  Add desired avocado to the rice, top with a single shrimp.  

If you want a more refined look, you can also add rice again to the the top of the avocado and then remove it from the mold.   Then top that with a shrimp placed on its side and drizzled with the barbeque butter.  I thought this was plenty of rice for the very large shrimp I used.   For my first time, I thought this was quite tasty.  


Friday, August 24, 2018

Avocado Caprese Salad

This was another video that was floating around.  You hardly need a recipe.

Heat 1/4 Cup Balsamic Vinegar with a Pinch of Sugar over medium heat.  As soon at it starts to simmer, remove from heat.  The water will evaporate to create a more concentrated thicker Balsamic Glaze. 

Cut Avocado in half and remove the pit.  Brush with Lemon Juice to keep from turning brown.  Cut Mozzarella Pearls  and Grape Tomaotes in half.  Add these to the avacado cavity.  Drizzle with Oil Olive and Balsamic Glaze.  Add S&P and Basil.  Serve at once. 

Chicken Roulade

You've seen the quick videos that show a dish being prepared, well this one caught my eye.  What I like most about it is that it can be made most of the way and finished in the oven in about 20 minutes give or take whether or not I had to refrigerate it first.  I like a meal like this  because I can get it mostly ready then dinner can be on the table in the time it takes to cook the pasta.  


Preheat oven to 375.  


Each chicken breast will net 2 roulades.  First, rinse 2 Boneless Chicken Breasts and filet each in half resulting in 2 full sized breasts but half as thick.  Place in a gallon zip lock and pound them to get a consistant thickness.  Pat them dry with a paper towel.  Add S&P and Pesto.  (NOTE: I added Basil Leaves instead of pesto, so either way can work.)  Add 2 or 3 Thin Roma Tomato Slices and Grated Mozzarella Cheese.  Roll the chicken breast, starting with the pointed end and secure with a tooth pick.  Heat a skillet over medium and add Olive Oil to coat.  Brown all sides of the chicken.  It will not be completely cooked through and will have to be finished in the oven.  


Once browned, top with Mozzarella Cheese, drizzle with Olive Oil and add S&P and a Basil Leaf. Add Grape Tomatoes to the pan and place in hot oven for 15-20 minutes.  Serve over hot Pasta. 

If making this ahead:
Once the roulades are browned, let cool and refrigerate .  Remove from the refrigerator as the oven heats to 375.  Heat the skillet and add Olive Oil to coat.  (If you don't heat the skillet first, the chicken will absorb the oil resutling in a greasy finsihed product.)  Add the Chicken Roulades and top with Mozarella and drizzle with Olive Oil and S&P and a Basil Leaf.    Add grape tomatoes and place in hot oven.  May need 20-22 minutes to finish so it is cooked thoroughly and hot in the center.  Serve over hot pasta.  

Some other roulade ideas are Brie and Asparagus or Ham and Swiss.  

Saturday, June 9, 2018

Potatoes Anna

This is a very old classic recipe.  It's simple to make and cooks in the oven.  

Peel 2-3 lbs Potatoes.  I used small Russets for this, because that's what I had on hand.  Cut a 1/2 Stick Butter into small cubes.  
Preheat oven to 425 and spray a 10" oven safe skillet with cooking spray.  I used my All-Clad stainless skillet.  

Using a mandolin, slice the potatoes to 1/16" and arrange them into the pan in a shingled, circular fashion.  After each layer, season lightly with Salt and Pepper and after every 2 layers, dot with butter cubes.  Make 6 layers in all and dot the top with butter.  

Cover the skillet and place in hot over for 40 minutes.  Remove lid and bake for an additional 15-20 minutes til a deep golden brown.  Remove from oven and let rest for 5 minutes.  The "pancake" should easily be removed from the pan and place on a plate with the bottom side upward.  Serve at once, sliced into wedges.

Tuesday, April 24, 2018

Lemon Chiffon and Raspberries

My son worked on a restaurant project for Health class.  He had to have at least 1 dessert that was GF which was one of many requirements he had to create to satisfy dietary needs.  He came up with Lemon Chiffon and Blueberries, so in otherwords, a crustless Lemon Chiffon dessert.  

For bookclub tonight I volunteered to make a dessert and decided I would steal his idea.  I found beautiful raspberries yesterday so I substituted them for blueberries though any combination of readily available berries will work.  I made the chiffon from the Blueberry Lemon Chiffon pie already posted on my site.  It's light, not overly lemony or sweet - it's just pleasant enough and I've made it many times to date.  I decided to make individual portions in ramekins mostly because they'll be easy to tranport and I have one for each person.  
This recipe made (10) 4oz portions.  


Place 4-5 Raspberries (I bought 2 pints) in the bottom of each Ramekin and place on a sheet pan.    

Zest and juice 2 Lemons so you have 1/2 Cup Lemon Juice.  

Heat a pot of water that can be used as a double boiler so that when you place the bowl in the pot, it's a tight seal and the water reaches the bottom of the bowl.  

I have a hand mixer as well as a stand Kitchen-Aide mixer, so I use my hand mixer for the yolks and the Kitchen-Aide for the Whites.  

Separate 4 Eggs into 2 bowls, the yolks go into your double boiler bowl.  

While beating the yolks, slowly add 4 TBL of Super-fine Sugar.  The yolks will become pale and thicker and will create a ribbon when you raise the beaters.  While beating, slowly add the lemon juice and stir in the zest.  The mixture will thin out at this point.  Place the bowl on your pot of water and continue beating until the mixture becomes thick and is very warm to the touch.  Remove from heat without over cooking it.  

Beat egg whites until foamy and add a few pitches of salt then beat until the volume more than doubles and has medium peaks (ones that fold over but hold that shape) when you remove the beater.  Slowly add 3 TBL Super-fine Sugar and continue beating until stiff and glossy but not dry.  Fold whites into the yolks, adding small amounts at a time.  This should take 4-5 additions and you should be left with no whites showing and a consistent pale yellow color throughout.

Spoon or pipe chiffon onto the raspberries.  

When ready to serve, preheat oven to 400.  Bake for 10-12 minutes until golden brown.  Serve at once or at room temperature. 

Monday, January 15, 2018

Chick-Fil-a Knockoff Sandwiches

I have made these now 3 times and the third time they were very close.  The first time I made them the chicken was too thick.  I fileted the breasts making them thinner but they were far too big around.  The second time, I added  flour because the recipe didn't have enough corn statch but that didn't work very well.  

This third time, I cut the breast in about half, and the I fileted the thinner end into two pieces and the thicker side was fileted into 3 pieces.  These were the perfect size.  The other change I made the third time, was from my tempura days, I decided to double the corn starch the recipe called for and I added Baking Powder - that made all the difference in the world.  Instead of 2 breasts, I graduated to 4 Boneless Skinless Chicken Breasts which netted 18 peices of chicken.  My son ate most of it!  I think I got 1 sandwich from that batch.  

Harris Teeter sells Boneless Chicken Breasts for $1.99 a pound and you can't beat the quality, no hormones used, and the pieces for the sandwich ends up somewhere around $.35-$.40 each!  Not bad.  

First, rinse and filet the chicken breasts.  Add no more than 9 or 10 pieces to a 1 gallon Zip lock bag.  For each bag: add 1/2 Cup Dill Pickle Juice, I like Mount Olive Hamburger Dills.  Marinate for 1 1/2 to 2 hours.  Meanwhile get dry ingredients ready.  1/2 Cup Corn Starch, 2 tsp Paprika, 1 tsp Baking Powder, 1 tsp Salt, and 1 tsp Pepper.  In a bowl, beat 1 Egg with 2 TBL Buttermilk.  After marinating, open bag and squeeze the open end, so the chicken remains inside, and drain the juice. To the bag add the egg mixture and massage.  Let it sit for 5 minutes.  Again, pour out any excess liquid and add the dry ingredients.  Zip the bag closed and massage the dry ingredients until you know the chicken is coated.  In the meantime, heat a pot (I use my iron pot) with 4" Canola Oil until 375 on a thermometer.  Preheat oven to 275.  Add a cooling rack to a sheetpan.  Add 4-5 pieces of chicken to the oil.  Once it begins to look opaque around the edges, flip each piece over.  Cook until the same golden brown.  Place on the ready cooling rack and place in the oven. Let the oil get back to temperature before adding more pieces.  Continue cooking until all the chicken is done.  

For serving, lightly butter and brown a Soft Style Hamburger Bun. Add chicken and top with pickles.  Enjoy!!

Pictured, I made dish of Baked Beans that my sister C turned me on to and is posted here on my blog. Go to the search tab on the top right corner and type in Baked Beans  and it should come up.  

Friday, December 1, 2017

Turkey Vegetable Soup

I've never done this before; traditionally we make Tetrazzini with our leftover turkey but this turned out delicious and made just over 3 quarts of soup - enough to have now for a few meals and also to freeze for a meal later. 

In a very large pot, over medium heat, add 2 TBL Olive Oil and sweat 1 Medium Sliced Onion and 2 Stalks of Celery, rinsed with the ends cut off and cut into 1" lengths.  Break or cut Turkey Carcass (hopefully with some meat left on it) into 3 or 4 peices.  Add the pieces to the pot.  Add Approximately 3 Quarts Chicken Broth until covered.  I topped with water so I didn't have to open another quart of broth.  Simmer with the lid off for around 35-45 minutes.  Strain the broth into a smaller pot.  Let the turkey cool so you can handle it and remove all the turkey from the bones and place in the broth.  Disgard everything else.  

You can freeze some or all at this point and you will finish it when you are ready to eat.  It was cold out, so placed my pot on my porch in order to cool quickly and to remove some of the fat, then froze some of the soup for a later meal. 

If having now (and when you thaw to use), simmer pot of Broth and Turkey.  Add 3/4 Cup Basmati Rice for 2 quarts of soup and let it cook in the broth til almost done.  In the meantime, rinse, remove ends and cut 1/2 lb Fresh Green Beans into 1" lengths and add these to the pot.   Peel and cut 2 Large Carrots to a 1/4" dice and add these to the pot.  Add 1 Cup of Frozen Peas to the pot.  Season with Salt and Pepper.  Really you can add what you want in the quantities you prefer.  

Once the vegetables are done serve with a Salad and Warm Crusty Bread or a Grilled Cheese Sandwich.  

Friday, June 16, 2017

Blackened Shrimp Tacos with Peach Salsa

We've been eating lighter now that it's hot.  Yesterday I had a hankering for Shrimp Tacos with a zesty Peach Salsa, so I picked up what I needed just before dinner.  Let's say this was a nod to Louisiana.

The Peach idea came from years ago, when a guest chef at the local farmer's market found things at the booths and cooked fish and served it with a simple fresh peach salsa.  I thought it was the coolest idea.  We are talking 15 years ago, so though there is no way I could duplicate what he did I made my own quick Salsa.

Rinse Shrimp, peel devein, pat dry, and add 5 to each skewer, this just makes for easy grilling.  Drizzle with Olive Oil and season with Blackening Seasoning on both sides, I like Paul Prudhomme's the best.

For the Salsa, Dice 2 Ripe Peaches.  Mince a few strips of Jalepeno - use them to your liking depending on how much heat you want.  Add 1 tsp Freshly squeezed Lemon Juice.  Season with 2 tsp minced Cilantro and if you want, 2 tsp Minced Red Onion.  Drizzle with 1 TBL Olive Oil and stir.

Shred lettuce, I used Red Cabbage and Spinach, but you can use micro greens, napa cabbage, sprouts of any sort, really whatever you want.

Preheat Grill til hot and grill shrimp, turning once.  Warm the tortillas in a dry skillet so they are pliable.

We have taco tenders and I recommend them. Assemble tacos by placing shredded greens in the bottom, add 3 shrimp and top with Salsa.  We sampled Gluten Free Tortillas but I didn't care for the texture at all.  I would stick with flour tortilla's or if Gluten Free is needed, I would rather make my own with gluten free flour.

Friday, June 9, 2017

Pasta Night - for Everyone!

Our club offers a pasta night once a week.  It's a really cool concept.  Two times now I have done my own Pasta Night at home ~ once on account of having leftover Rigatoni and last night intentionally using a really good Italian Gluten Free Penne.  

In the even years, my family holds a week long family get-together at Thanksgiving with about 28-30 of us all eating meals together.  We change up some of the dinners from year to year.  Based on the the head count as it builds each day prior to Thanksgiving Day, we decide which dinners are for a smaller group vs the full group. 

This meal is cool because it's cooked to order and the selections are chosen by the diner which works well when trying to accommodate various dietary restrictions.  I have been trying to work this out to serve it for a large group.  Having a few cooks and multiple pans will make it possible for a large group.  I'm also thinking the kids eat first, then adults afterward.

It's all in the prep, then it goes together quickly and with a big group working together, that part is fun.  The more ingredients you have, the more combinations you can offer. 

For last night, for three of us, this is what I served.  I already had the Marinara made, so that saved a step.  I have a vegetable plot in our community garden and had some Broccoli and a small Red Cabbage that I picked about an hour before prepping.  I also picked some Thia Basil from the community garden and I had some Fresh Parsley in my herb pots.  I just bought Sugar Snap Peas and a Yellow Squash.  I also had 2 links of cooked Italian Sausage from the night before that I cut into 1/2" slices.  I also had a locally grown Onion that I bought last Sat at our local farmers market.  So you can see where this is going with all of these fresh ingredients.  

We are trying out a gluten free diet so I precooked and cooled a very good Italian Gluten Free Penne made by a company called Schar.  I made Afredo Sauce and had that near by.  I quickly steamed the sugar snap peas and the broccoli each for about two minutes and placed them in separate bowls.  I thinly sliced the onion and the cabbage and placed them in separate bowls.  I recently bought a new Mandoline and made waffle shaped slices with the Summer Squash.  You can add whatever you want though, sauteed peppers, roasted eggplant, sliced zuchinni, sliced (or quartered) mushrooms, cooked bonelss chicken breast, raw shrimp, capers, pressed garlic, etc.  The larger the group, the larger the offering.

I have a 12" All-Clad skillet that is perfect for this meal.  Heat the pan over medium heat and add a TBL of Olive Oil.  Add the ingredients that the diner requests.  Sauté these together for a few minutes adding Salt and Pepper to taste.  Add the pasta and toss for about 1 minute.  Add Alfredo and toss for about 30 seconds til combined and hot.  If the sauce thickens too quickly, have water ready and add a splash or two as needed.  

For plating, in a pasta plate, add marinara to the bottom and swirl.  Add the freshly cooked pasta to the plate and top with freshly grated Parmesan Cheese and garnish with Italian Herbs and S&P if needed.  Eat at once with a salad and hot crusty bread.  

Wash the pan and utensils and begin again.  

Other sauces that can be added instead of just Alfredo and Marinara are Pesto, Tepenade, a Roasted Red Pepper topping, and even a Marsala or Picatta.  So with the combinations, the dishes are endless.  

For a big group, set out the pasta plates and the ingredients buffet style.  Allow each diner the chance to add to the bowl what they would like.  Then they can bring it to the cook who can make the dish to order.  NOTE: If using raw Shrimp or any raw meat, the plate has to be washed before serving.  I would have raw shrimp near the cook who can add it directly to the pan and all other meats I would precook.

Another option is have everyone gather in the kitchen, allow the cooks choice on the combinations, enjoy them one by one as they are done by sharing straight out of the pan onto small plates.  

Have fun and photograph all the selections as the dishes are finished.  

Thursday, June 1, 2017

Shrimp and Grits

Last year was the first time I had Shrimp and Grits - if you can believe that!  I lived near New Orleans for 26 years.  The way it happened was, we were in the city for a Saints game and were surprised no one was at the entrance.  We inquired as to where everyone was only to learn that the game got moved from Noon to 3:30pm.  Since we lived 45 minutes away, we decided to go to Mr. B's for brunch and to look at artwork in the French Quarter.  There was a jazz combo playing and everyone seemed to be enjoying typical New Orleans Brunch fare.  We saw (and smelled) the Shrimp and Grits.  As the servers, ladened with dishes lined up their arms bustled by, that delicious New Orleans Barbecue scent lingered around us.  With that, we both ordered it!  The following week, I cooked the same dish for dinner and even a few times since then.  Now in NC where fortunately the shrimp is very good, I made Shrimp and Grits for dinner last night.  My son, who used to eat just three shrimp and not finish them, piled his plate high and ate every remaining shrimp.   I just had the five I photographed!  Oh well, next time I'll have to cook more.

Peal and devein enough Shrimp for those you are serving.  I had 1 1/2 pounds of Shrimp - after it was cleaned.   Place single layer on a paper towel lined plate in order to dry the exterior so it will brown.

You will need to find a Barbecue Shrimp Seasoning (I only use LaDon's) prior to attempting this dish.  To a small pot, add a few TBL of the Barbecue seasoning to 2 TBL butter, 1 Tbl Olive Oil, 1 TBL Lea and Perrins Worcestershire Sauce and Juice of 1 Lemon (zest the lemon first for a garnish).  Heat until melted.  Swirl to combine.

Cook enough Grits counting on 1/2 cup cooked grits per serving.  The way Mr. B's cooks their grits is they use milk.  Milk can be very salty so I use a ratio of 1/2 Cup Milk and 1 1/2 Cups water.  Cover and heat over medium high heat til it boils.  With fork in hand, slowly add the 1/2 Cup Grits stirring all the while until combined.  Add a 1 tsp Salt and 1 Tbl Butter.  Turn to low and cover and allow to cook for about 5 minutes.  Stir again, turn off heat, and cover to allow to finish.  Stir one last time to make sure they are cooked.

Heat an empty skillet over medium high heat.  Add 2 TBL Olive Oil and 1 TBL Butter.  Add Shrimp and cook quickly tossing all the while to ensure all the shrimp are cooked.  This only takes a matter of minutes.  Top with Lemon Zest and Fresh Parsley.

For plating, to a pasta plate, add the barbecue seasoning, top with grits and top with Shrimp.  Enjoy with crusty warm bread and a salad and maybe even a jazz tune.

Sunday, February 26, 2017

Smashed Baby Red Potatoes

Before we relocated, I began getting rid of magazines, dozens and dozens of them.  I tore out all sorts of recipes and stuck them in a folder to add to my personal cook book.  This recipe is in that folder and I just bought herbs and a variety of baby potatoes plus we are grilling rib eye steak tonight.

This is simple enough that if you are entertaining you can at least boil the potatoes in advance.  You can also make them ahead entirely and have them ready for the oven after guests arrive.

In my estimation, any single herb or combination of herbs will do, just base it on what you are serving with them.  You could even use only minced chives or only minced parsley and serve with a side of sour cream for dipping.  Tonight though, I used Thyme.

Rinse the 2 lbs Baby Potatoes and place in a pot and cover with cool water.  Add to the pot,  3 Smashed Cloves of Garlic, 6-8 Sprigs of whatever Herb you plan to use and a 1/4 Cup Salt.  Bring to a boil over medium high heat, reduce heat and simmer until tender.  Strain potatoes and discard the garlic and herbs.  Leave the potatoes in the strainer for 10 minutes in order for them to dry off.  They will be crispier that way.

Preheat oven to 425.  To a sheet pan, add 2 Tbl Olive Oil.  Place potatoes in a single layer on a sheet pan.  Using either the heal of your hand - or I used the flat side of my meat tenderizer - flaten each potato until it is the thickness of 1/2".  Brush upward facing side with 1 TBL Olive Oil.  Season with Salt and Pepper.  Roast in the hot oven for 25-30 minutes until golden brown.  I turned the potatoes over about half way through cooking.  

While the potatoes are roasting, mix together, 2 TBL Unsalted Butter, 1 Tbl minced Fresh Parsley, 2 tsp chopped Thyme, 1 tsp chopped Rosemary, 1 Pressed Garlic Clove, 1/2 tsp Salt, 1/4 tsp pepper.  When potatoes are golden brown, place on serving platter and brush them with the herbed butter.  Serve immediately.  

NOTE:  If you don't prefer the uncooked garlic, you can omit it all together and instead before roasting, quarter lengthwise 2 bulbs of Shallots and place the separated the layers to the pan.  Red Onion will work as well.   

Saturday, December 31, 2016

Martha Stewart's Oven-Dried Tomatoes

I am in the process of relocating to a new state.  The sad thing is, my new kitchen is nothing like the one I have.   So with this move comes cleaning stuff out and just reducing "my stuff" whether kitchen equipment, bowls I love that have a chip, or things I haven't used in years, it's all going to a new home before I depart.

I have years of Martha Stewart Living magazines, fully in tact.  I am going through them one by one and ripping out anything that is still of interest and pitching the magazine.

The other day I came across this oven roasted tomato recipe that I recall  wanting to make when I first read this issue years ago but somehow never found the time to do so.  We are having company for New Year's Eve and it will go nicely with the Asparagus with Brie Sauce (from Savoir Faire) my son plans to make as an hors d'oeurve.

This is really very simple and I could kick myself for not making it sooner.  You just have to plan ahead because it roasts for hours.  I decided since tomatoes aren't exactly in season, that I would buy four varieties of cherry tomatoes.  The recipe calls for "paste" tomatoes which appear like romas in her picture but they were sort of pale and these cherries will roast a little faster, say four hours rather than five hours.  Mine are roasting now and smell delicious!

So preheat the oven to 200.  Line a sheet pan with Parchment Paper.  Cut 16-20 Cherry Tomatoes in half.  Place them on the sheet pan cut side up.  Cut thin Slices of Garlic and place on each tomato.  Drizzle with good Olive Oil.  Add Fresh Thyme and season with Salt and Pepper.  Place in oven, in my case for four hours.  Check every 30 minutes after the first few hours.  Serve at Room temperature with a crostini, a peice of fresh spinach, a slice of Mozzarella Cheese, really what ever you have on hand.

They can be placed in a jar with additional Olive Oil and stored in the refrigerator for up to 3 days.

It's January 1, 2017.  Happy New Year!  I can tell you these were delicious.  5 of us ate them all along with the appetizer my son made.  Wow, I can tell you I will be making these often.  Thank you Martha Stewart!

Wednesday, March 16, 2016

Tomato Basil Soup

Lately, I have eaten Tomato Basil Soup but have never attempted to make it ~ until today.  I found a nice recipe in my California Fresh Cook Book published by Jr League of Oakland-East Bay.  If you are a vegetarian, on a tight budget, or just like fresh homemade food, this is a recipe for you!

What made this particularly special is that I made it with my son, whom I homeschool and we served the soup in warm Panera Bread Bowls.  

Preheat a large pot over medium heat.  Once hot, add 1/4 C Butter, 1 Medium Coarsely Chopped Vidalia Onion, 2 Medium Diced Carrots.  Cook until soft, about 5 minutes.  

Meanwhile, rinse and quarter, 8 Medium Vine Ripe Tomatoes.  Coarsely chop 1/4 C. Fresh Basil.  Add Tomatoes, Basil, 1 tsp Salt, 3/4 tsp Sugar, 1/2 tsp Freshly Ground Pepper to the pot and stir to combine.  Cover and simmer for 15 minutes.  Add 2 Cups of Chicken Stock (use Vegetable Stock for a vegetarian version).  Cook for an additional 10 minutes.  

At first we both thought the soup looked a tad bit thin, probably on account of my increasing the tomatoes from 5 to 8, so I added 1 Tbl uncooked Basmati Rice to the soup and once it was cooked, I blended it in for a heartier version.  That is an option for you depending on your tastes.  

Either using a blender in batches, blend soup until smooth and return to a clean pot or using a hand blender, whirl until the soup is blended.  The hand blender will not make a completely smooth soup.  If you want a silky smooth soup, use the blender method.  

While soup is cooking, preheat the oven to 300 and add the desired number of bread bowls and bake until crusty.  Remove a circular top and hollow out the bowl.  Turn off the oven, but return the bread bowls to the warm oven until ready to serve.

Once soup is done, season if necessary and serve in the warm bread bowls.  What a delicious lunch we had!!

Saturday, December 14, 2013

Salmon, Scales on, Cooked in the House

Every time I hear the word "salmon", it reminds me of an early episode of American Idol where Kellie Pickler was describing to Simon a dinner she had the night before.  She told him she a eaten saLmon for the first time, pronouncing the L.  He didn't quite know at first what she was talking about and finally he said something like, oh, salmon, saying it properly.  She looked at him dead serious and said you know there is an L in there.  It was too cute.

As my son says, moving on...
We have been cooking salmon more often than in the past and the main reason is that I have found a suitable way to cook it.  I have a previous post where I grill it and that is divine, but at times I don't want to mess with the grill.  I like my salmon just under done, firm but tender and ever so slightly, soft.  My husband wants his rare.

The first line of success is that we shop for 2 pieces of Salmon that are different thickness.  We always buy the salmon the day we are cooking it and I don't want any leftover.  The fillets should be firm to the touch, have relatively little to no smell, and be very bright in color.  The fish for dinner last night came from the Mandeville Seafood Market on Highway 59 and it was super fresh.  I think it was around $9.99 a pound.

For this preparation, I preheat the oven thoroughly to 350 and I preheat an empty pan over medium heat.  I rinse the fish and pat it dry.  I add a drizzle of olive oil to the flesh side of the fish and add S&P.
I begin with my piece of salmon.  I add it to the skillet, FLESH side down.  After about 4 minutes or so, and once browns, it will easily lift from the pan in 1 piece.  I turn it over now scale side down. 

At this time, I add the thicker piece of salmon to the skillet, SCALES side down.  I sprinkled dill on the the flesh side of both pieces.  I place the pan in the oven for 8-10 minutes depending on how thick it is.  While it is finishing in the oven, I thinly slice a lemon.  When I remove it from the oven, I place each piece of salmon on our respective plates.  I add 1/2 TBL butter to the fish and let it melt over the flesh.  Next, I layer the thin sliced lemon and sprinkle a bit more dill.  My husband likes capers so I add them at this time. I tent the plates with a piece of foil and let it rest for 5 minutes.

For this meal, I happened to have risotto that I made the day before and had that warming on the stove.  When we were ready to eat, I sprinkle my fish with a pinch of Hawaiian Black Salt that I bought this summer.  It was crunchy and really tasty.  I felt it complimented the fish well, you know, Hawaii & Salmon, a good combination.

NOTE:  If you both like the same doneness, just stick to one or the other preparation.  I hope you give this a try.  Salmon is a really great fish for a lot of reasons.  The nutritional value is superb. 

Sunday, October 27, 2013

Skinny Cado

If you like avacado, you may want to switch from the smaller nubby Haas variety to the larger and slightly more expensive Florida Avacado.  It turns out, the Florida Avacdo has 1/3 less fat for the same size portion.  I feel it has a slightly milder flavor.   They are larger than the Haas Avacado, so you get more to work with, per piece of fruit.

I love to serve sliced Avacado when we have fajita night or if I am serving a dinner salad as a meal.  Also, when ripe, it is slightly firm so it holds up well.  I normally slice out exactly the wedges I plan to eat, leaving the seed in place to keep the fruit from oxidizing.  If you are serving it on a buffet, you can squeeze and lightly toss with either lemon or lime juice, to keep the color bright.  For storage, when I have only used a few wedges, I wrap it with plastic wrap, making sure the wrap touches the flesh to reduce or slow oxidation.  I try to eat it within a the first few days of opening it. 

I find that eating Avacado (in moderation) when serving lighter fare, keeps me from returning to the kitchen a few hours later.  The fat is considered a healthy variety because it is monosaturated, similar to why Olive Oil is considered a good choice over vegetable oil.

Pictured, I ate these 4 slices on a Oven Roasted Turkey sandwich on Wheat Bread.  I used about 1 tsp of Mayonnaise and a small sprinkle of Kosher Salt directly on the Avacado.  It was delicious!!

Friday, July 12, 2013

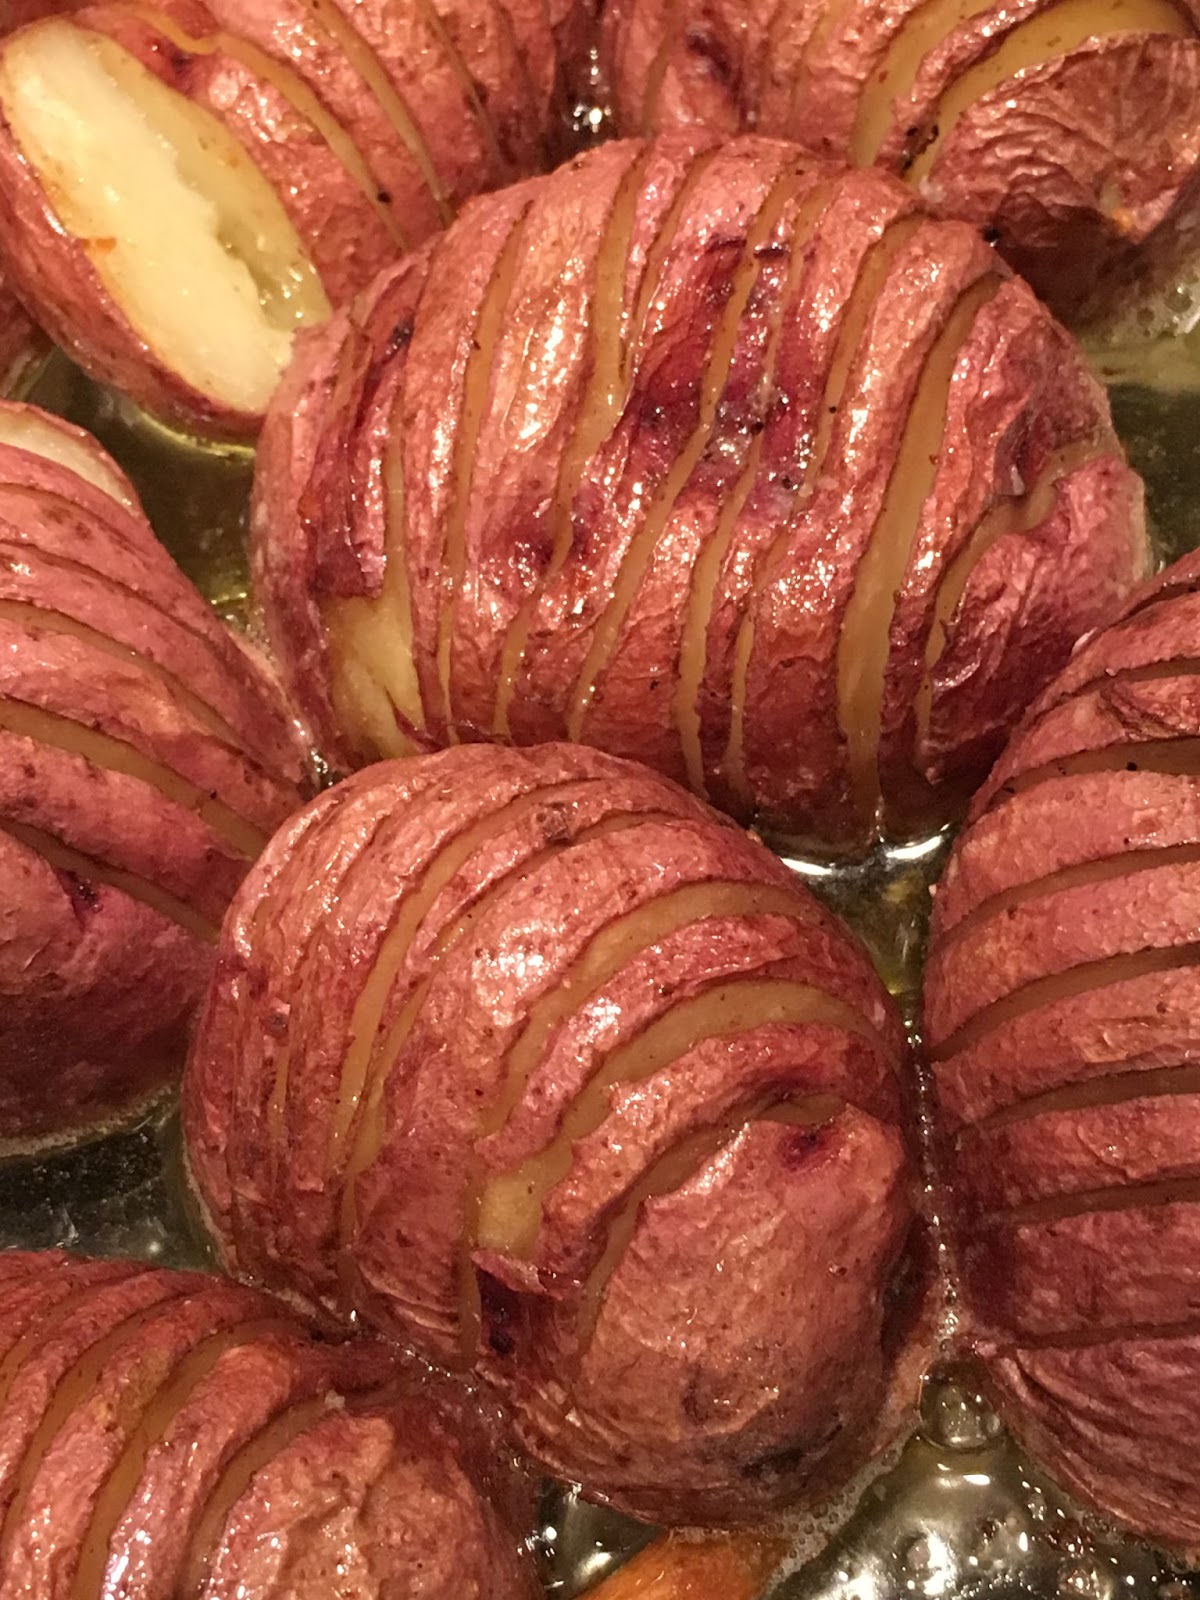
Butterflied (or Butterfly) Potatoes

I am grilling Rib Eye Steaks tonight.  I plan to slice them since they are thick.  I am cooking what my mother used to call "Butterflied Potatoes".  These can be made with any variety of potato that lends itself well to roasting in the oven.  Here is the recipe for Butterflied Potatoes.

Preheat oven to 375.  Cut 4 Large Red Potatoes in half.  Place cut side down and without going all the way through to the bottom, slice each one at 1/4" intervals.

Place the potatoes in a glass dish and drizzle each with 1 tsp Olive Oil.  Sprinkle with S&P to taste.  Add 2 Tbl butter to dish.  Place in hot oven for 40-50 minutes depending on how big your potatoes are.  Every 10 minutes or so, baste each potato with the olive oil/butter mixture.  This will open up the slices of potatoes, like a butterfly.  This dish never fails to take me back to my childhood days, when Sunday dinner was served at 1pm.