Thursday, November 24, 2011

Roasting Turkey 911

Did you ever take for granted your elder's ability to roast a turkey that is always perfect?  Then, the rude awakening, you find yourself on your own for the first time and realize you have no clue how to do it?

Get a good sturdy roasting pan.  Mine has a rack and it reduces the cooking time because it allows heat to move around the bird.  Decide if you are going to stuff it or not and if so, what will you stuff it with.
Make sure you buy either a fresh bird (it's never been frozen) or allow for ample thawing time.  These things are frozen solid and require 3 days in a refrigerator to thaw.  If you try to cook a frozen turkey I can guarantee it will be raw in the middle and the parts that are cooked will be dry.  Remember when you remove the packaging to rinse the turkey inside and out and to remove all the things inside.  There is normally a neck stuffed in the main cavity and there is a cavity in between the wings and it contains the plastic bag with the giblets.
Determine, who is going to carve it, on what and with what, make certain the knife is sharp.
Work out a time table.  First, determine what time you want to eat.  Back out 20-30 minutes for carving and another 30 minutes allowing for the bird to rest.  In essence, it needs to come out about 50 minutes - 1 hour before you want to eat.
Stuffed and roasted on a rack, a turkey cooks for 18 minutes a pound.  Stuffed without a rack, 20 minutes a pound.  I tend to round down the pounds before calculating because over cooked turkey is dry and as a leftover it's not that great.  A perfectly cooked turkey on the other hand is delicious during the feast and for all the leftovers.

Once you are ready to cook the bird, Preheat oven to 325.  While the oven is heating, butter the outside of the bird without double dipping anything that touches the bird to retouch the butter.  Don't be too particular about spreading the butter, in the end it melts and it's used for basting.  Salt and Pepper the outside on of the bird.  I found Dried Sage this year and sprinkled a light amount on the outside.
With 2 hours left to cook, add 2 Medium Onions cut into Quarters to the roasting pan.  You can separate each quarter into 2 pieces, but don't separate all the layers or they will burn.  With 30 minutes to go Add the Giblets to the roasting pan for the giblet lovers.  Giblets don't agree with me, so I remove them from the pan before making gravy.
Pictured 1 1/2 hours into it.  Baste every 45 minutes or so.  As the skin darkens, loosely tent a piece of foil covering the skin to prevent further browning.  This may have to be done after about 1 1/2 - 2 hours of roasting.
I will continue to add notes on cooking times.  It is very important to record what you did and how it turned out so adjustments can be made for next time.

For today my plan is to roast a 14.85 pound turkey, stuffed and on a rack for 4 hour, 12 minutes.  Perfecto!!  That cooking time was just perfect.  17 pound turkey, stuffed and roasted on rack,  roasted for 4 hrs 45 min, rested for 40 minutes, perfect!
Serve with all of your family favorites!

Tuesday, November 22, 2011

Miniature Apple Purses

So simple! So delicious!  I love these because they are small, 4 bites.  When served with an assortment of miniature desserts, your guests can try a variety!
I made up this recipe just this afternoon.  I used 2 apples and 1 sheet of puff pastry and made 16 mini purses.    I have a bit of the filling left over and will use it to top pancakes tomorrow or the next day.
Here is my Apple Purse Recipe.
Make sure the puff pastry sheets are thawed.  I used 1 Sheet of Pepperidge Farms Puff Pastry Sheets which come 2 to a box.  They are found in the freezer section.  Preheat oven to 400.  Peel, section, and dice 2 Golden Delicious Apples into tiny cubes about 1/4" x 1/4".  In a saucepan over medium heat, melt 4 Tbl UnSalted Butter and add 1/4 Cup Brown Sugar.  Once bubbly, add 1/4 tsp Cinnamon, 1/2 tsp Vanilla, 2 Pinches of Salt and 10 grinds of Fresh Nutmeg.  Add Diced Apples.  Cook until they appear to be getting soft but hold their shape, about 3-4 minutes.  The mixture should be just about to bubble without boiling.  Add 1 Tbl Flour and cook for 1 more minute.  Remove from heat and set aside.
Roll out Pastry keeping its' square shape.  Cut into quarters.  Working with 1 quarter at a time, cut into quarters again.  Roll each quarter so you have a piece about 3" square.  Place about 1 Tbl of apple filling in the center of each piece of pastry.  Wet the edges with Heavy Cream.  This will act as glue. Bring up the corners and sort of pinch the entire thing closed.  Gently tie with string.  Place purses on a light colored sheet pan allowing 3" of space between them.  Brush the outside with Heavy Cream.  Dust with Sanding Sugar.
Place in oven and bake for 10-12 minutes or until golden brown.  Pictured they are baking.  Let cool for 10 minutes before trying to remove them from the sheet pan.  They should lift easily.  Can be made in advance and reheated for 7 minutes in a 350 degree oven.  Place on a warm platter to serve.

Friday, November 18, 2011

Russian Blini

My son did a heritage project at school.  He was born in Russia and the research proved to be very educational.   Today was the feast where the students brought food from the country they reported on.  I have been wanting to make blini pancakes for some time now and decided to make them for this event.  (At the same time I made the blini pancakes, I taught my friend C how to make scones.  Her son reported on England.)
This a neat yeast batter that is made in steps over a period of hours, though time consuming, the finished result is delicious!
Instead of traditional sour cream and caviar, I chose to serve them with strawberries and whipped cream.
I have been to Russia 4 times and have had blinis on every trip.  On the last trip I began to really wonder how they were made because they have tiny air pockets and are not a "quick batter" which is leavened by adding baking soda, baking powder or air.  They were pliable like a crepe but just to be sure it wasn't the same thing, twice at dinner, I ordered crepes for dessert and I was served crepes, not blini.  I believe Gourmet's recipe is as close as you may get and it is indeed made with yeast.  If you make other thinned out batters then you are actually making crepes and if they look like the pancakes you get in the US and the batter is made the same way, you are simply making  the pancakes you are familiar with.  Here is the blini recipe straight from The Gourmet Cookbook.
In a large bowl, stir together 1 package of Dry Active Yeast (2 1/2 tsp), 1/4 Cup Warm Water (105-115 degrees) and 1 tsp Sugar.  Let it become bubbly for 10 minutes.  Meanwhile, in a pot, warm 1/2 Cup Milk and 1 Tbl UnSalted Butter until warm (105-115 degrees).  Add 1/2 Cup Buckwheat Flour, 1 Tbl Sugar and warmed milk to the yeast mixture and combine vigorously with a wooden spoon.
Cover with plastic wrap and either let rise in a warm place for 2 hours or for a more pungent blini, let rise overnight in the refrigerator.
Again, warm 1/2 Cup Milk to 105-115 degrees.   Separate an egg reserving the white in a bowl.  This will be beaten later.  Add to the batter the Milk, 1/2 Cup regular Flour, 1/2 tsp salt, and 1 Egg Yolk.  Using a wire whip, combine for 1 minute.  Cover and let rise for 1 hour.  With 10 minutes to go, using a hand mixer, beat 6 Tbl Heavy Cream until soft peaks.  Completely wash the beaters.  Beat the Egg White until stiff peaks begin to hold.  Fold the beaten cream into the batter.  Fold the white into the batter.  Heat a griddle and using butter cook 3" blini pancakes.  You can keep these warm on a platter until ready to serve.  Serve with caviar, sour cream, smoked salmon or just simply with berries and sour cream or whipped cream.
pree-YAHT-nah-vah ah-pee-TEE-ta!! (bon appetit)

Tuesday, November 8, 2011

Potatoes 3 Ways

The kids will be out of school soon and company will visit in the coming holidays.  I decided to try something I haven't done before.  Recently,we have bought baked potato salad at some of the local grocery stores and it's good but the potatoes have a texture as if they were either under baked or cooked in a way other than baking.  I decided to buy a $3  5lb Bag of Russet Potatoes and bake the entire bag.  There were 11 potatoes in the bag and they were fairly consistent in size.
On the first night, we had Baked Potatoes with Sour Cream and Grated Cheese.  I am going to make Home Fries with the 2 largest potatoes.  With the remaining 6, I will make a Loaded Baked Potato Salad of my own.  I plan to add Sour Cream, Grated Cheese, Crumbled Bacon and Scallions to the potato salad.  They were all very good and think of the price.  I bought 8oz Grated Cheese, 16 oz Sour Cream, 1 lb Bacon (of which I used 1/2), 1 bunch of Scallions (you can use Chives), and Canola Oil for the Home Fries.  What a deal!

Friday, November 4, 2011

Super Simple Mozzarella and Tomato Hors D'oeuvre

I bought what was called "Mozzarella Pearls".  I added them to a flat platter.  Using 1 Pint Grape Tomatoes, either keep them whole or cut them in half.  Add 1/4 Cup Good Quality Olive Oil.  Add a Few Grinds of Pepper and a few Pinches of Kosher Salt.  Top with Chiffonade cut Basil just before serving.  Serve at room temperature with frilled tooth picks.

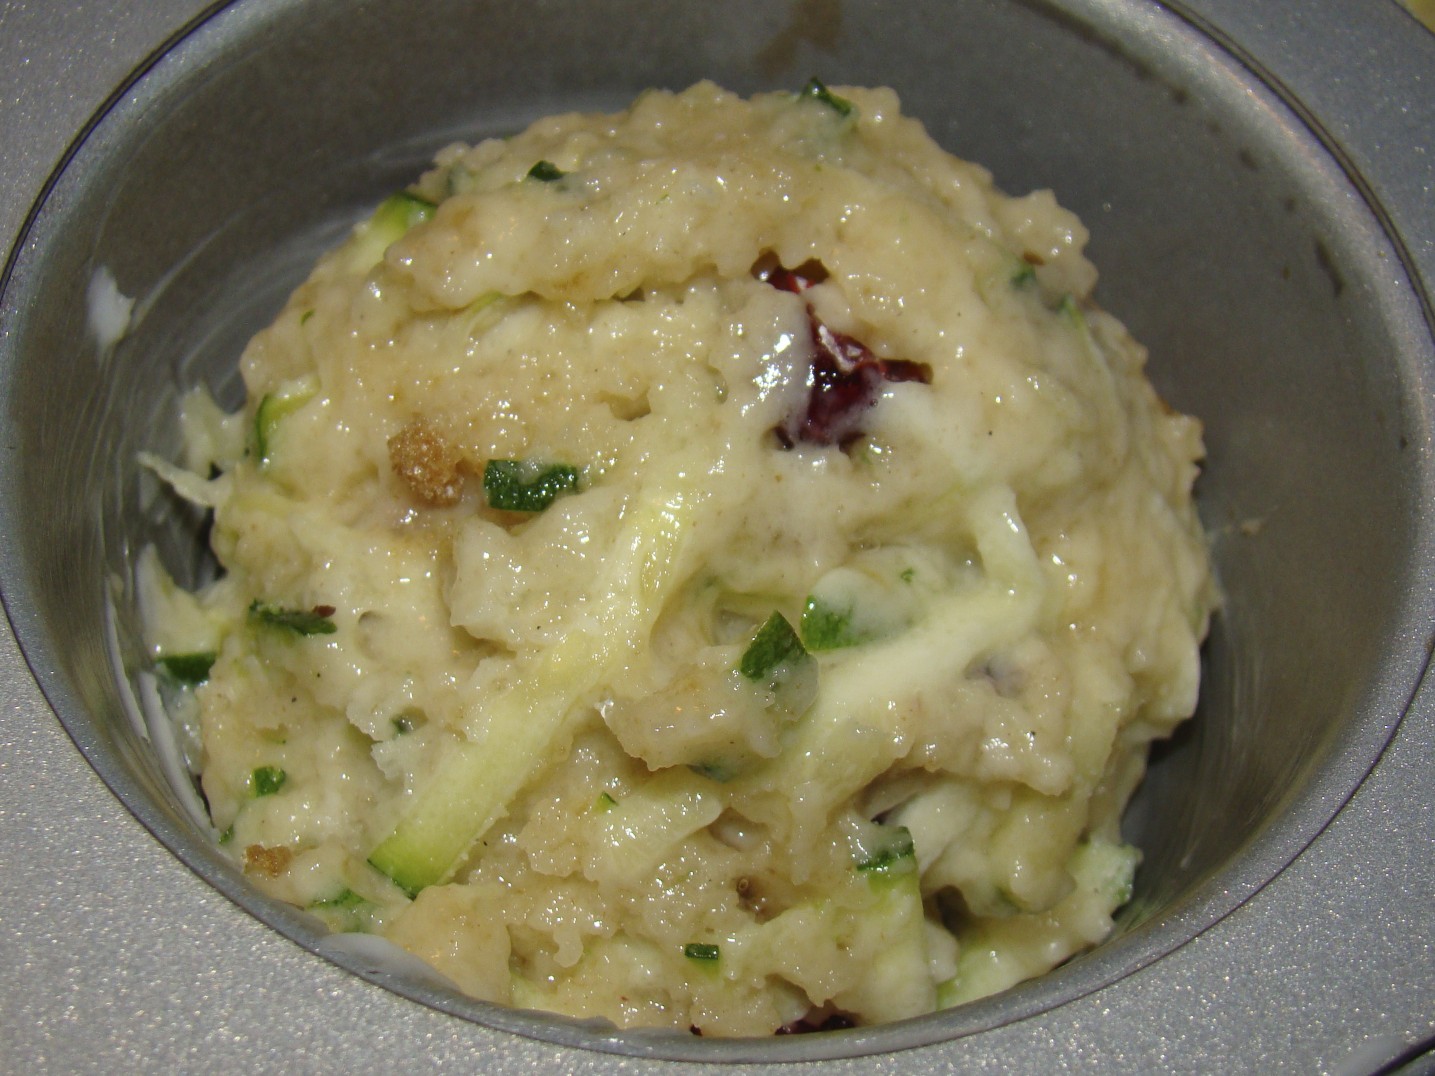
Zucchini Craisin Muffins Recipe

I made up this batter recipe for Zucchini Bread.  I adapted that recipe for muffins.
Preheat oven to 375.  Grease 2 muffin pans or use muffin liners.  In a bowl, mix together 3 Cups Flour, 2/3 Cups Packed Brown Sugar, 1/3 Cup Sugar, 12oz Craisins, 2 tsp Baking Powder, 1/2 tsp Baking Soda, 1 tsp Kosher Salt, a touch of Cardamom, and a few grinds of fresh Nutmeg.  Hand mix with a wire whip to combine ingredients.  Grate 2 Medium sized Zucchini either on a grater box or with a mandolin.  Add to bowl.  Set aside.  In a 2 cup measuring cup begin stacking these ingredients, it'll save on the cleanup!  1/2 Cup Canola Oil, 1/4 Cup Milk, 1/4 Cup Sour Cream (add sour cream to the cup until line comes to 1 Cup), and 2 Eggs.  Mix with a fork until the egg is broken up and the sour cream is distributed.  Add the wet ingredients to the bowl and mix with a wooden spoon or rubber spatula until just combined.  The batter will seem a bit sticky and possibly slightly dry but not to worry, zucchini is a watery vegetable and will make it all good in the end!
Scoop batter using a 1/4 Cup Scoop into the muffin pan.  Makes 22 muffins.  I always leave a corner open on each pan in order to handle the pan without destroying a muffin.  Place in oven and bake for 18-20 minutes.  You can serve this with Orange Flavored Cream Cheese by combining the Zest of 1 Orange into 8 oz softened Cream Cheese.  Serve muffins warm.

Wednesday, November 2, 2011

Tilapia Topped with Hand Picked Crabs and Lemon Butter Sauce

This was so delicious topped with local hand picked crabs.  The crabs were cooked perfectly with the right amount of seasoning.  The Talapia was cooked perfectly with the right amount of lemon and butter in the sauce.
Heres what I did.
Buy 6 Crabs.  These came from Mandeville Seafood Market and were $20 a dozen, not bad.  Hand pick crabs.  If you don't know how to do this, buy local crabmeat already picked (and hopefully seasoned.)
First, some prep.  Heat water for pasta.  Rinse and pat dry 1 Tilapia Fillets per person.  Zest and juice 1 Lemon.  Mix 2 tsp Corn Starch with 2 tsp Chicken Broth and set aside.  Cut 1/2 Stick UnSalted Butter into 4 pieces.
Heat empty skillet over medium heat until thoroughly heated.  Add salt and pasta to water.  Add 1 Tbl Oilve Oil and 1 Tbl UnSalted Butter to skillet.  Add fish fillets to skillet and cook until just done turning only once.  The second side will take slightly less time than the first.  Remove the fish from the pan, place on a plate, and cover loosely with foil.
Make Sauce.  Add Lemon Zest and cook for 10 seconds.  Add 2 Tbl Dry Vermouth and cook for 30 seconds.  Add Lemon Juice and cook for 30 seconds until it appears thick.  Add Corn Starch Mixture and 1/4 Cup Chicken Broth. Cook for another minute or 2 allowing it to bubble gently.  Turn off heat and add butter.  Swirl gently.  Add Crab Meat.  Plate up pasta and fish and top with the crabmeat sauce.  Serve with a salad, a buttery white wine, and crusty bread.

Wednesday, October 26, 2011

Mini Wonton Wrapper Quiche Recipe

These are just perfect as an appetizer, snack, or buffet breakfast / brunch.  My tennis team acknowledged Breast Cancer Awareness last week and this was one of the things we ate.  I baked them in the morning and brought them warm, still in the pan.


Here's what I did.  NOTE: This recipe makes 24 quiches. There are 48 Wontons Wrappers in a package so this can be doubled to make 48 quiches.  

To get a jump on it, the night before, cook 6 slices Thick Slab Smoked Bacon until crisp and grate 1 Cup Emmentaler Cheese.


The following morning, first take the wontons out of the refrigerator so they warm up and become pliable, otherwise they will crack.  Preheat oven to 350.  While oven is warming, do some prep.  Melt 1/2 Stick Butter.  Crumple the bacon.  Cut 12 Grape Tomatoes in half the long way.    Brush all the cups of a mini-muffin pan with the melted butter.  To a bowl, (I used a batter bowl for easy and quick pouring) add 5 Eggs, 1/2 Cup 1/2 & 1/2, 1 Tbl Flour, S&P to taste.

Keep the wontons in a stack and cut all 4 corners off.  Working 1 at a time, brush each wonton with butter and arrange it in each of the cups, butter side down. Fill each cup with Egg Mixture.  Add 1 tsp of Grated Cheese, crumpled Bacon (you have enough for 1 slice per 4 cups) and top with a Grape Tomato, cut side up.  Place in hot oven and bake for 18-20 minutes.  Serve at once straight out of the pan!

Tuesday, October 4, 2011

Frozen Chocolate Mousse with a Chocolate Cookie Crust

If you want to impress your friends, make this dessert.  It's a bit time consuming but it's all cleaned up by the time you entertain.  My inspiration came from a spring-form pan I found that is 3" tall and 6 1/2" in diameter.  I basically made my chocolate mousse recipe, with a few changes, and froze it.
For the Cookie Crust, in a food processor, add 12 Nabisco Chocolate Wafer Cookies.  Add 1 Tbl Sugar and 1 Tbl melted UnSalted Butter.  Grind until you have find crumbs.  Lay a piece of plastic wrap in the pan to ensure your mousse won't stick.  It should hang over the sides.  Add a generous layer of crumbs in the bottom of a spring-form pan and gently tap using a flat bottomed glass or a round meat tenderizer.  Place in freezer.
The mousse recipe is made in 3 basic steps.  Organize how you will use 2 pots and 3 bowls, as you need 2 double boilers.
To a bowl that will fit into a pot to create a double boiler, add 6 oz Ghirardelli Semi Sweet Chocolate, 6 oz UnSalted Butter and 1/4 Cup Water.  Fill pot with 2" water and heat over medium heat.  Place the bowl in the pot.   Melt the mixture while stirring until smooth.  Remove from heat and allow to return to room temperature.
Separate 4 Large Eggs, the whites into a mixing bowl and the yolks into a bowl that will fit over a pot of water.  In the second bowl, over 2 " simmering water, use a hand mixer to beat 4 Egg Yolks with 1/3 Cup + 2 Tbl Sugar and 4 Tbl Frangelico.  This will take about 15 minutes.  It should be fairly thick, almost like runny mayonnaise.  Remove from the heat and place the yolk mixture bowl in an ice bath in order to cool the bowl and therefore yolk mixture.  Continue beating the mixture until is is cool to the touch.  This may take about 15 minutes.
Fold the Chocolate Mixture into the Yolk Mixture.
Beat Egg Whites until frothy.  Continue beating until they begin to hold their shape. Add 1 Tbl Sugar and beat until shiny and add 1 tsp Vanilla.
Fold 1/3 of the whites into the chocolate mixture.  Do this 2 more times.  Add this on top of the cookie crust.  It should fill the pan to the top.  Freeze for at least 4 hours or overnight before serving.  To serve, whip 1 Cup Heavy Cream with 1 Tbl Sugar until the peaks hold.
Remove the ring from the frozen dessert and discard the plastic wrap.  Cut the frozen dessert with a sharp knife and place on a plate.  Add a dollop of whipped cream.  Either sprinkle with leftover cookie crumbs or chocolate shavings and serve at once.

Butternut Squash Risotto

This is a wonderful autumn dish that can go with any number of meats (ham, pork, lamb, beef or poultry) or can be eaten as the entree.  This dish takes time to cook so you shouldn't plan on walking away while it is cooking as it needs periodic attention.
First, skin a Small Butternut Squash.  If you haven't worked with one, the neck is solid meal and the bulb is where the cavity.  Cut the squash in half where the two sections meet.  Place the cut side on a board and using a sharp knife, remove the skin using a top to bottom motion, turning as you go until all that is remaining is the meat.  For the neck, cut long slices about 1/4" thick.  Cut the slices into 1/4" strips and dice into 1/4' cubes.  For the bulb, cut in half and remove the seeds.  Place squash on a board so it represents a dome.  Cut 1/4" slices, cut the slices into 1/4" strips and the strips into 1/4" cubes.  Some of these pieces will be misshapen because of the curves but try to keep the general dice uniform so it cooks for the same length of time.  Dice a Small Vidalia Onion into 1/4" cubes.  Heat an empty sauce pan over medium heat.  Add 2 Tbl Olive Oil.  Once the oil is hot, add the vegetables and cook stirring often for about 6-8 minutes until the onion has sweated and the squash begins to become soft.  Do not brown the onion.  Add 1 Cup Arborio Rice.  Stir for about 1 minute.  Begin adding 32 oz of good quality Chicken Broth, 1/4 cup at a time.  (NOTE: If you are serving this to a vegetarian, use vegetable broth.)  Stir during and after each addition.  As the rice absorbs the broth, it's time to add more.  Continue adding broth until the rice is cooked but not mushy.  You may or may not use all of the broth.  Add Kosher Salt and White Pepper to taste.  Serve with Grated Parmesan Cheese.  Though I didn't add any herbs, after eating this I concluded that I would add finely minced Rosemary or Thyme.