Tuesday, July 22, 2014

Homemade Mozzarella Caprese Salad with Grilled Bread

I made Homemade Mozzarella for the second time.  This turned out better than the first time because I pulled it longer.  It was firmer and held its shape better.  One gallon of milk made 2 generous 8oz portions of cheese.   

For lunch I ate Slices of Mozzarella and Fresh Tomatoes drizzled in Olive Oil and Balsamic Vinegar, topped with Cracked Pepper and Hawaiian Black Salt.  I placed the tomato and cheese on Grilled Slices of Bread.  It was delicious!!

Monday, July 14, 2014

Grilled Skirt Steak

I found skirt steaks recently and they are not always available unless you really look or ask.  The first time I had skirt steak was at the Fog City Diner in SF.  This was in the 80's, mind you, but that was the dish to order.  It was served, unsliced, with a huge pile of delicious shoe string fries!

This past Friday night, I made up my own quick marinade.  Skirt Steaks are long so I cut it in half.  One end is thicker than the other so if you want them both the same done-ness, place the thick one on the grill first.  For the marinade, I used about 2 Tbl Soy Sauce, 1 Tbl Rice Vinegar, 1 Tbl Stone Ground Mustard, 2 Tbl Brown Sugar, 2 Tbl Water, 1/4 tsp Coriander and Cracked Peppercorn to taste. You can add Garlic or even Red Pepper Flakes for more bold flavor.

Years ago, I bought a neat Tupperware container for marinating.  It has a waffle design so the marinade touches whatever you are marinating.  You add the lid, a similar design, and just flip the container e very so often.  It all goes in the dishwasher.  I highly recommend investing in something like this if you marinade a lot; I use it just about weekly.  I make my marinated right in the container and simply add the meat.  Marinate the skirt steak(s) for at least an hour.  When ready, preheat the grill with the lid shut, to at least 600-650 degrees.

Oh, I should add, we finally replaced our infer-red grill!  I am back to doing what I love!!

To grill the steak, place on the grill on the diagonal.  You are going to cook both sides twice to get cross marks.  For medium rare, cook the first side for about 3-3.5 min then flip and cook for another 3-3.5 minutes.  Then turn 90 degrees to the marks you have on the first side and cook for at least 3-4 minutes.  Then finally flip to the 2nd side again and cook for at least 3-4 minutes.  The grill will cool down so you may even had to go 4 minutes on the second cooking.  NOTE: Think about your flipping before you mess with this so your marks are good. 


I served mine with oven made Fries.  I thinly cut elongated New Potatoes and tossed in good quality Olive Oil and cooked til crispy.  They take over an hour in a 375 oven, turning about every 20 minutes. 

The skirt steak can be grilled and served whole or can be sliced after resting for 5 minutes.  The sliced steak is delicious leftover in a Fajita or Steak Quesadilla!!

Sunday, June 15, 2014

Lemon Blueberry Pancakes


If you like light lemony things, you will love this recipe!!  We have 6 Blueberry Bushes in our yard that must be about 18-20 years old.  They produce an abundance of blueberries in spring when we have winters of heavy rain and this year was a doozy.  They were 3 weeks late this year, on account of a cold winter, but they were abundant!!

On Father's Day, we were getting the first of our blueberries and I usually have a bag on lemons on hand at any given moment, so that's was on the breakfast menu.

I took my Mom's Buttermilk Pancake recipe and amended it by substituting some of the Buttermilk for lemon juice.  The results were tasty.  The surprising part was the fact that instead of 12 pancakes it made 18.  The difference was air.  When the lemon hit the baking powder it expanded in such a awesome way, that the pancakes were light and fluffy.  The typical golden brown outside became sightly caramelized because of the lemon and had a really good flavor. 

The first round was served with Vermont Fancy Grade Syrup but it conflicted somewhat with the lemon.  In the end all they needed were a smear of butter and a dusting of powder sugar.  Wow delicious!!

Preheat your griddle to 375.  In the meantime, place the dry ingredients into a bowl.  1 Cup Flour (or mixture of flours ~ I used all-purpose and whole wheat totaling 1 cup), 1 TBL Sugar, 1 tsp Baking Powder, 1 tsp Baking Soda, 1/2 tsp Kosher Salt, the Zest of 1 Lemon.

I was given a neat juicer for squeezing lemons and limes.  Cut the zested lemon in half and have handy the juicer.  

To a measuring cup add, 3/4 Buttermilk, 2 TBL Canola Oil, and 1 Egg.  Give it a stir.  Juice both halves of the lemon into the mixture.  Add the wet ingredients to the bowl.  Stir with a wire whip until smooth.  Fold in as many Blueberries as you want up to 3/4 Cup.  You will see the batter expand right away.

Spread Crisco on the griddle where you intend to place the pancakes.  I use Crisco because butter has a very low smoke point and will burn and oil doesn't stay put.  Pancakes need to set up and brown quickly and the higher heat helps them rise.  I have found that Crisco offers better results. 

Ladle the desired size, cooking 6 at a time.  I like a short stack of 4 pancakes so I use about 1/4 cup of batter per pancake.  Because of the light nature of this batter, the berries will settle on the bottom.  When ladling, you have to go to the bottom for the fruit.

You are going to turn the pancakes only once.  Once they look done around the edges and the top batter is still wet, flip quickly.  I find I use less butter if I lightly, without deflating the pancakes, add butter to the cooked side at this time.  Once the second side is cooked to your liking, place a stack on a plate and dust with Powdered Sugar.  Serve immediately as they come off the griddle.

NOTE: for a few variations, you can add toasted Nuts or Oatmeal to the pancakes at this time or for a decadent breakfast, Whipped Cream.  In the winter when Raspberries are in season, substitute them! 


Oatmeal Berry Banana Muffins

Coming soon.

Sunday, March 30, 2014

Broiled Artichokes

I love artichokes!!  Right now, I believe Artichokes are coming into season because they look awesome and the price is low, $.99 each for large.

I don't cook them often enough.  In the past, I have made this really neat recipe for oven baked stuffed artichokes from a Tuscany The Beautiful Cookbook that I own.  The leaves are pulled apart and stuffed with milk soaked bread.  They are sealed tightly and baked.  I will have make them soon and share that recipe with you.

A few months ago while in Baton Rouge, I ate at J. Alexanders for lunch.  The food was delicious, btw!!  The Fired-Grilled Artichoke appetizer was outstanding!  Additionally, about 10 years ago, I ate at The Cheesecake Factory in Maryland.  There, I had also ordered an artichoke appetizer that was wonderful, similar to the fire-grilled variety, but served with reduced balsamic glaze.

As a kid, when my mother brought home artichokes, we cooked them in seasoned water with Lemon, Olive oil, salt and whole peppercorns.  Once done, we ate them while standing around the kitchen counter.  We simply pulled the leaves off, one at a time, and dipped the leaves in melted butter.

The inspiration for today's recipe comes from all of those experiences and spans the many years. So today, I am going to make up a recipe that combines the two preparations.  Artichokes take time to cook and are inedible if undercooked.  I feel that broiling alone will leave them undercooked, so I am cooking them first and broiling them later.

I am working with 2 large Artichokes. First, using a very sharp knife (I just sharpened mine 2 days ago) remove them bottom outside set of leaves since they can be tough.  Next, trim the stem so the artichoke is flat on the bottom.  Trim 1/2" off the tops of the leaves and using a spoon, clean cut the very center of the fine purple leaves and try to remove the parts that resemble "hair".  They are very fine fibers.  Soak them in water to rinse while you are working.

To a pot, add enough water that the chokes will be covered.  Add the squeeze of 4 lemon wedges then drop the wedges in the pot.  Add 1/4 Olive Oil, 1 tsp Salt, and 20-30 peppercorns.  The peppercorns can be any color you choose.  Add the artichokes and heat over medium until simmering.  Cook for about 35-45 minutes, depending on the size.  Remove from water, let cool for 5 minutes (up until now can be made ahead).  Once cool enough to handle, cut the artichokes in quarters.  Place on a sheet pan, cut side up. 

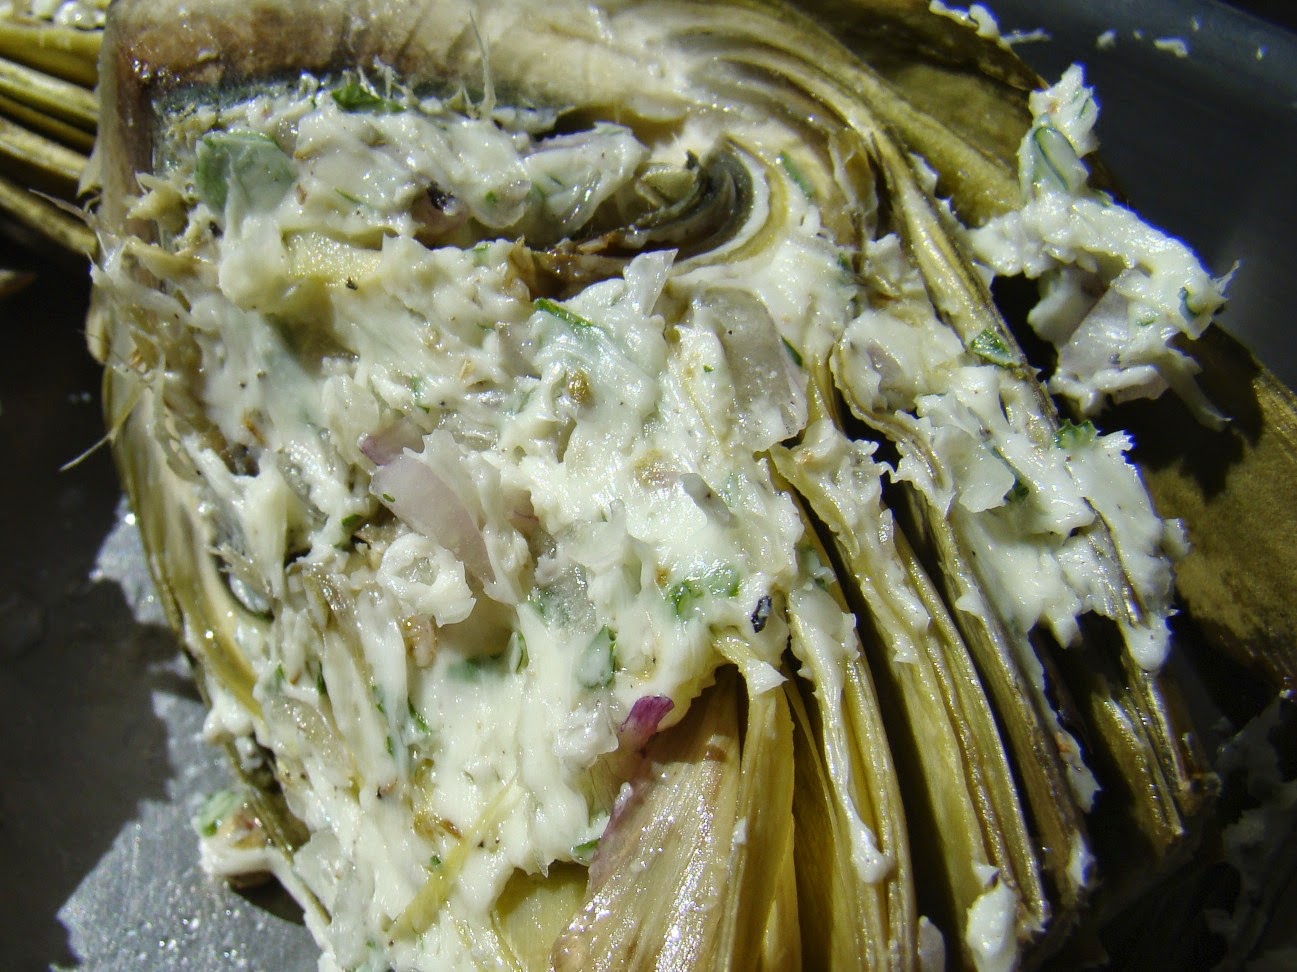
Make an herbed compound butter by combining 3 Tbl Softened Butter, 1 Minced Shallot, Salt and Pepper, Fresh Parsley.   Add the butter to the cut side of the artichoke and try to get some in between the layers.

Preheat the broiler and when hot add the artichokes and cook for 5-7 minutes until browned.  While broiling, add 1/4 Cup Balsamic Vinegar and 1/4 tsp Sugar to a saucepan.  Reduce over medium heat for a few minutes until thickened.  Place the artichokes on a platter and drizzle with Olive Oil and Vinegar.  Eat right away with warm crusty bread.


Thursday, March 13, 2014

Black and White Mustache Cupcakes

My son turned 12 today and he wanted cupcakes for school.  I made my favorite batter, Martha Stewart's One Bowl Chocolate Cake from her baking handbook, which made 35 cupcakes.  After that though, I had a hard time coming up with a theme for him.

Naturally, once I decided on mustache's, I couldn't find them at Michael's but I did find these cool cupcake papers that force the batter to rise taller than the muffin pan, so I snagged 2 packs of those.  I always like to buy a windowed box to make them easy for transport.  As a kid, we always used shoe boxes to bring treats to school.  Boy have times changed! 

Next, I was in Target and they had 3 packs of mustache's left so I bought 2 of them as well as black and white striped napkins.

I think of mustache's as a coming of age theme even though I personally feel coming of age is a few years away.  But this kid is 5'7" and wears size 12 shoes.  On top of that he feels he has earned the stripes of a full fledged independent adult even though I remind him constantly that he can't wake to his alarm.

We must be nuts but this birthday gift is a trip to the Miley Cyrus Bangerz Tour.  Boy, times have really changed!!

Tuesday, January 28, 2014

Cheesey Buttermilk Biscuits

This is actually from Martha Stewart's Hors D'oeuvres Handbook, which by the way, is an excellent reference if you like to cook.  This is her White Cheddar, Sage, and Buttermilk Biscuits, p 350.

So the story today is that here in the deep south, we have 2 days off from school because of a threat of wintery and icy conditions.  So for me that is code for 2 fulls days to bake and cook.  Yesterday, I bought a few things I needed in order to get cracking and first up is Cheddar Buttermilk Biscuits and scrambled eggs.  I don't have sage so sans the sage.  I'm not sure my son would like it anyway and he needs to put meat on his bones!!

This recipe goes together in the time it takes to heat the oven to 400, so turn it on first.  Make sure 1 Stick Unsalted Butter is sitting out so it becomes cool, but not room temperature.   Line a sheet pan with parchment paper cut to fit.

To a bowl add, 2 Cups Flour (I used 1/2 Cup Whole Wheat Flour and 1 1/2 Cups All Purpose Flour).  To that add 4 tsp Baking Powder, 1 TBL Sugar, 1 tsp Kosher Salt, 1/2 tsp Cream of Tarter.  Stir with a wire whip to combine.

Cut Butter into quarters the long way and then the short direction making 1/2" cubes and drop in flour mixture.  Cut with a pastry blend.  If you don't have one, improvise using 2 knives in a cutting motion in opposite directions.  This should resemble coarse cornmeal.  Stir in 1 Cup Cheddar Cheese.  Today I used 4-Cheese Mexican because it's what I have on hand.  Add 2/3 Cup Buttermilk.  Stir until just combined.

Dump dough onto a floured pastry cloth and shape into a rectangle.  Fold the dough onto itself, top 1/3 and bottom 1/3.  (As you can see by the photos, by dough has some ever so visible layers as a result of the folding).  Re-shape into a rectangle.  For shaping, I place my hands outside of the pastry cloth and shape using the cloth so my hands don't heat up the butter.  Roll the dough so it is an even consistency, a healthy 1" thick, while shaping til you are satisfied.  That is all the handling this dough should get or it will become tough. 

I bought this cool rectangle mold in Austin last year and thought I would make a new shape.  Once cut, place on parchment and brush with 1/2 & 1/2 and dust with Sanding Sugar.  Bake for 15-18 minutes until golden brown. 
Let rest a minute or 2 and devour at once!!

Thursday, January 2, 2014

Cleaning and Organizing the Walk-in Pantry

I have A LOT of kitchen stuff.  Over time, like and similar things have been placed in different parts of the kitchen.  Paper goods, plastic cups, and small appliances in particular have me searching here and there when I want them.  Today I am tackling the job of unloading 3 cabinets plus my walk-in pantry.  I am going to reorganize all of them once and for all!  I am taking control this 2014 because I am tired of thinking about it.

My camera didn't have a charge so I failed to get the a true before shot of the pantry.  It actually wasn't too bad but there are coolers that I want out and I needed to make better use of the varying widths of the shelves.

These photos are of the cabinet messes I have accumulated, so you get the idea...a lot of stuff.  I use most of it but just not all the time.  The left hand column is the before and the right, after.


These final 3 photos are of the pantry.  I threw away at least 4 trash bags of stuff.