Showing posts with label Side Dish. Show all posts

Friday, January 11, 2019

Zucchini and Tomato Mini Skillet Side Dish!

For Christmas, I gave my son these awesome 3 1/2" mini Lodge Skillets along with a skillet meals magazine.  We had to adjust the recipe for 4 mini skillets rather than a 10" skillet but it worked out well.   We will have lots of fun using them!  

First up, he had his friend K for dinner and I prepped and they built these cool side dishes.  Once done, we each had our own side dish served  hot from the oven.  Put these ingredients into separate dishes.  Thinnly Slice 1 Medium Zucchini.  Add Salt and Pepper to Zucchini and sweat the water from the Zucchini which will take about 15 minutes.  Slice 1 Small Onion, Thinnly slice the bulb of 1 Leek.  Cut in Half about 10-12 Grape or Cherry Tomatoes.  I make my own Bread Crumbs from the heals of bread but you can toast bread and make your own or even substitute Panko Crumbs.  

Preheat Oven to 375.  Lightly coat each pan with Olive Oil.  Add a layer of Onion.  Layer the Zucchini.  Add Leeks.  Top with Parmesan Cheese and Tomatoes.  Drizzle with Olive Oil and add a sprinkle of Oregano, Salt, and Pepper.  As we learned, these shrink slightly so you can fill them to the very top.  Bake in a hot oven for 25-30 minutes.  Let rest and serve on a small plate straight from the oven to the table  Enjoy!

Friday, August 24, 2018

Avocado Caprese Salad

This was another video that was floating around.  You hardly need a recipe.

Heat 1/4 Cup Balsamic Vinegar with a Pinch of Sugar over medium heat.  As soon at it starts to simmer, remove from heat.  The water will evaporate to create a more concentrated thicker Balsamic Glaze. 

Cut Avocado in half and remove the pit.  Brush with Lemon Juice to keep from turning brown.  Cut Mozzarella Pearls  and Grape Tomaotes in half.  Add these to the avacado cavity.  Drizzle with Oil Olive and Balsamic Glaze.  Add S&P and Basil.  Serve at once. 

Saturday, June 9, 2018

Potatoes Anna

This is a very old classic recipe.  It's simple to make and cooks in the oven.  

Peel 2-3 lbs Potatoes.  I used small Russets for this, because that's what I had on hand.  Cut a 1/2 Stick Butter into small cubes.  
Preheat oven to 425 and spray a 10" oven safe skillet with cooking spray.  I used my All-Clad stainless skillet.  

Using a mandolin, slice the potatoes to 1/16" and arrange them into the pan in a shingled, circular fashion.  After each layer, season lightly with Salt and Pepper and after every 2 layers, dot with butter cubes.  Make 6 layers in all and dot the top with butter.  

Cover the skillet and place in hot over for 40 minutes.  Remove lid and bake for an additional 15-20 minutes til a deep golden brown.  Remove from oven and let rest for 5 minutes.  The "pancake" should easily be removed from the pan and place on a plate with the bottom side upward.  Serve at once, sliced into wedges.

Friday, February 16, 2018

Baked Broccoli Rice

I was walking through a big boxed store earlier this year and they were sampling Broccoli Rice.  I never buy stuff I can make at home but I knew it was something my growing teen would love.  So I sampled it in order to make up my own recipe.  It's really a simple dish to assemble and bakes for about 25 minutes plus it can be made ahead.  It lends itself well if you need to bring a dish with you.  Will pair nicely with any meat, for example, Grilled Steak, Roasted or Grilled Chicken, Baked Ham, Panko Crusted Pork Chops, really you name it.  It also holds the heat well if you are transporting it to someone's house.    

Preheat oven to 375.

First, cook the rice so it's slightly under done.  You should do this whenever baking any pasta or rice so you don't end up with mush.  

I like to use Bismatti Rice because the grains are long and the rice has a pleasant nutty flavor.  Add 1 Cup of Rice and 1 1/2 Cups of Water to a pot fitted with a lid.  Add Salt to taste and 1 TBL Butter.  Stir with a fork.  Cover and place over medium heat and cook until it's about to boil.  Reduce heat to low and simmer for about 6-7 minutes.  Turn off heat and give it another quick stir, replace lid and let the water absorb.  Remove from heat, rinse in cold water, and strain, to stop the cooking process.  You can leave it in the strainer.

Add 2" of water to a pot that will fit a steamer basket and heat water (without the basket) over medium heat.  Rinse and cut Broccoli so you have tops with a small amount of stem.  You want 2 Cups of Cooked Broccoli in total.  Place the Broccoli in the steamer basket and place it in the preheated pot with water.  Return lid and let steam for about 2 minutes.  The Broccoli should be bright green.  Remove from heat and rinse in cold water to stop the cooking process.  

Make a quick béchamel.  In a thick bottomed pot, over medium heat, melt 2 TBL Butter.  Once melted, add 2 TBL Flour and stir with a wire whip and cook until it bubbles gently for 3 minutes.  Do not let it brown.  Add 1 1/4 Cups Milk.  Let it cook for another 6-8 minutes, until it thickens.  Add 2 Cups of Grated 4-Cheese Mexican Blend and stir until the cheese is melted.  Season with Salt and Pepper to taste.  Add broccoli and rice to the sauce and gently stir with a spoon.  

Butter a caserole dish large enough to hold the rice mixture.  Add the mixture to the dish and top with bread crumbs.  Dot with 6-8 1 tsp bits of Butter and season lightly with Paprika.   

I grind my own bread crumbs, but Panko works well.  

Bake in hot over uncovered for 25-30 minutes until bubbly and warmed through.  Let rest for 5 minutes before serving.  


Saturday, January 6, 2018

Linguine Carbonara

We had 2 snow days which has extented our New Year Holiday and left me motivated to try some new dishes! I figured Pasta Carbonara is perfect dish for a cold winter night.  

This one was pictured in Williams-Sonoma's Christmas catalog and caught my eye.  They used to print the recipes within the pages but now you have to go online and their test kitchen posts all of their ideas in their recipe section.  I had to do a bit of hunting but finally located the one I was looking for.

They used a fat spaghetti shape and I used Linguine.  I think both are suitable.  I read all the time about adding reserved pasta water to dishes but this is the first time I actually did it.  My family competely loved this dish and I can still imagine the delicious flavors, even now, so needless to say, this recipe is a keeper!  

I served it with a simple salad but you can pair this with all manner of things, a Grilled Veal or Pork Chop, Ribs, Boneless Chicken Breast, Italian Sausage, Cheese Toast, even Seared Scallops, but you get the idea, it's versatile! I can even invision adding Orange Zest to this dish for a new dimension.

This makes 4 servings and in my household more like 3 because 1 person, whom we shall not name, ate 2 of them!  Cut 6 Slices of Thick Smoked Bacon Crosswise into 1/2" Lardons.  (NOTE: Lardons are my new favorite Bacon shape!)  

In a preheated skillet, cook Bacon, stirring often, until crispy.  In the meantime, get a pot of water boiling for pasta and ready 2 Cloves of Garlic in the garlic press.  In a bowl, beat 2 Eggs and add 3/4 Cups Parmesan Cheese.  Mince 1 Tbl Fresh Parsley.  Once you remove the cooked bacon, press the garlic into the bacon fat and cook til fragrant, about 1-2 minutes.  Remove the garlic with a slotted spoon and add to the dish with the bacon.  

When ready, cook 12 Oz Pasta til al dente and reserve about 1/2 Cup of Pasta Water.  Strain pasta and return to the pot.  Add the Egg and Parmesan Cheese mixture.  Toss to coat until cheese is melted.  Add pasta water as needed to create a sauce that just coats the pasta.  Top with the Bacon, Garlic and place in Pasta Serving Platter.  Serve onto pasta plates, grate additional Parmesan to order and top with parsley and freshly ground salt and pepper.  Enjoy!

My son took a photo using a filter and though I am typically against filtering my food photos and don't even edit them, I have to admit this one looks pretty appealing.  You be the judge.

Friday, January 5, 2018

Scratch Made Green Bean Bake

My sister, D, served green bean bake on Christmas.  Truth be told, after leaving home I never once made this dish nor had a hankering for it, nor have I ever even bought French's Crispy Fried Onions.   It was never my favorite dish when my mother made it, but when I saw my sister's version, it looked different from what I recalled and it definitely smelled better.  When it was served, it was the first thing I tasted and it was awesome.

I asked her about it and she said they made it from scratch.  Hers didn't have mushrooms and I couldn't find a recipe that omitted them.  I got in my head how I would make a quick sauce but came across recipes with cheese and really all manner of twists depending on what direction the recipe went.  With that, I called her to find out what she did.  There wasn't cheese in hers but there were some other ingredients that gave the dish flavor and though she didn't have mushrooms, she thought she would add them next time.

This is my made up version of scratch made green bean bake.  String 12 oz Green Geans and blanche for 1 minute, rinse in cold water when done.  Butter a casserole dish.  Remove stem and clean and dice 6 oz Baby Bellla Mushrooms.  Slice thinly 1 Medium Shallot.   I made my sauce in a low sided pot, large enough for everything before pouring it into the casserole dish. Heat a pot over medium heat.  Add 1 Tbl Olive Oil and 1 Tbl Butter.  Add shallots and mushroom and sautee for 3 minutes til tender.  Dust with 2 Tbl Flour and stir.  Add 2 Tbl Sherry.  Let the alcohol evaporate, about 1 minute.  Add 3/4 Cups Chicken Broth and cook for about 5 minutes, letting the sauce thicken without allowing it too boil, but it should bubble gently.  Add 2 tsp Worchestershire Sauce, I like Lea and Perrins.  Add 1/3 Cup Half and Half.  Let cook for another 2-3 minutes.  Add the beans and stir to coat and pour into prepared casserole dish.  Top with French's Crispy Fried Onions.  

Preheat oven to 375 and bake for 25 minutes until bubbling.  Let rest for 5 minutes before serving.

I have a growing teen and though my husband and I had a serving each, our teen ate the rest.  So this can serve 4 but next time I plan to double the recipe.

Sunday, February 26, 2017

Smashed Baby Red Potatoes

Before we relocated, I began getting rid of magazines, dozens and dozens of them.  I tore out all sorts of recipes and stuck them in a folder to add to my personal cook book.  This recipe is in that folder and I just bought herbs and a variety of baby potatoes plus we are grilling rib eye steak tonight.

This is simple enough that if you are entertaining you can at least boil the potatoes in advance.  You can also make them ahead entirely and have them ready for the oven after guests arrive.

In my estimation, any single herb or combination of herbs will do, just base it on what you are serving with them.  You could even use only minced chives or only minced parsley and serve with a side of sour cream for dipping.  Tonight though, I used Thyme.

Rinse the 2 lbs Baby Potatoes and place in a pot and cover with cool water.  Add to the pot,  3 Smashed Cloves of Garlic, 6-8 Sprigs of whatever Herb you plan to use and a 1/4 Cup Salt.  Bring to a boil over medium high heat, reduce heat and simmer until tender.  Strain potatoes and discard the garlic and herbs.  Leave the potatoes in the strainer for 10 minutes in order for them to dry off.  They will be crispier that way.

Preheat oven to 425.  To a sheet pan, add 2 Tbl Olive Oil.  Place potatoes in a single layer on a sheet pan.  Using either the heal of your hand - or I used the flat side of my meat tenderizer - flaten each potato until it is the thickness of 1/2".  Brush upward facing side with 1 TBL Olive Oil.  Season with Salt and Pepper.  Roast in the hot oven for 25-30 minutes until golden brown.  I turned the potatoes over about half way through cooking.  

While the potatoes are roasting, mix together, 2 TBL Unsalted Butter, 1 Tbl minced Fresh Parsley, 2 tsp chopped Thyme, 1 tsp chopped Rosemary, 1 Pressed Garlic Clove, 1/2 tsp Salt, 1/4 tsp pepper.  When potatoes are golden brown, place on serving platter and brush them with the herbed butter.  Serve immediately.  

NOTE:  If you don't prefer the uncooked garlic, you can omit it all together and instead before roasting, quarter lengthwise 2 bulbs of Shallots and place the separated the layers to the pan.  Red Onion will work as well.   

Thursday, September 1, 2016

Couscous

I made a wonderful Couscous yesterday to bring to my book club meeting.  We read a book called The Diver's Clothes Lie Empty.   The book is set in Casablanca, Morocco.  Our club has evolved to  trying to prepare foods that are either mentioned in the books we read or served in the location of the setting.  I regret that I didn't photograph this dish, but will next time when I make it again.

The recipe in general came from The Gourmet Cookbook.  The recipe called for Moroccan Style Preserved Lemon Wedges which should have been made 5 days ahead and since I didn't have time I substituted Lemon Zest and Lemon Juice.

Here is how to make the dish.

Preheat Oven to 425.

Cut 1 1/2 Lbs Butternut Squash to a 1/4" dice.  Toss with Olive Oil and roast for 15 minutes, turning every 5 minutes.

While roasting is happening, cook 1 1/2 Cups Plain Couscous. (I used a 5oz box of Whole Foods 365 Couscous).  Boil together  1 1/2 Cups Water and 1/2 C Chicken Broth (use Vegetable Broth if making this for vegetarians) with 1/4 tsp Salt, 1/4 tsp Cinnamon and 1 Tbl Olive Oil.  Once boiling, slowly stir in couscous and remove from heat, keep covered and set aside for 5 minutes to cook.  Remove lid and stir with a fork to keep from clumping.

Meanwhile, toast 1/2 Cup Pinenuts in Olive Oil in a small skillet.  Chopped 1/4 Cup Parsley and set asside and measure out 1/2 Cup White Raisins.

To finish the dish, Dice 3/4 Cup Onion.  Preheat a large skillet over medium heat.  Add 1-2 Tbl Olive Oil.  Add Onion and cook until light brown.  Add Roasted Squash and stir.  Add Couscous and stir to combine.  Add Toasted Pine Nuts, Raisins and Parsley.  Add S&P to taste.  Remove to a large flat rimmed platter to keep from continuing to cook.  Serve immediately or at room temperature.  Enjoy!!

Wednesday, June 29, 2016

Spiralizer Vegetable Pancakes

I have been intrigued by the Spiralizer for sometime and being drawn to kitchen gadgets, I bought one.  Bed, Bath & Beyond sells the OXO for $40, $32 after the discount.   I chose that one because of the way the suction mechanism works.  It will get lots of use, though I am not so sure about zucchini cut into spaghetti and then cooked like spaghetti because I like my zuchinni carmelized. Because it's so watery, cooking in water seems like the workings for a watery mess to me.  We'll see, maybe it's pictured raw with olive oil and herbs but we are led to believe it's cooked.  

So first up for me was vegetable pancakes.  I make potato pancakes often enough but wanted to try vegetables along with a small Sweet Potato for a change.  They were fun to make and very tasty.  You can combine many vegetables, including things I chose but also, turnips, rutabagas, scallions, shallots, onions, bean sprouts, black olives, zuchinni, summer squash, jicama, etc.  Really anything you are in the mood for.


We just got a local Whole Food a few weeks ago.  They have tri-colored carrots on their immense salad bar so that became my inspiration.  I figured they must sell them as well and I was right.


It takes a little practice to use the spiralizer and the short ends of the carrots didn't work as well because there isn't anything to grip.  The fatter halves worked better, so I cut them in half.


What I spun created 12 nicely sized vegetable pancakes.  Spiralize onto a sheet pan, 1 Small Peeled Sweet Potato, 1 Peeled Orange Carrot, 1 Peeled Red Carrot, 1 Peeled Yellow Carrot, 1 Medium Zuchinni. To this I added 1/2 Red Onion cut along the radius to make long strips.  Place all of the vegetables in a bowl.  Beat 2 Eggs with a few TBL of Milk.  Add to vegetables.  Generously add S&P to taste.  Add enough Flour to coat the vegetables so the excess moisture is absorbed.  Right before cooking, I dusted with a bit more flour so the vegetable mixture isn't soupy.  


Preheat the oven to 250 and have ready a sheet pan with a cooling rack inserted.  Preheat a skillet over medium heat and add 1/2" Canola Oil.  Make small pancakes and place in hot oil.  Flip over one time once golden brown.  You can add additional S&P if needed to the cooked side.  What's neat is because the spirals come out as very long strands, you have to break them apart and the result is that no 2 are alike.  


Place the cooked pancakes on the cooling rack and place them in the oven once they are all cooked.  Serve warm!

Friday, June 10, 2016

Roasted Cauliflower with Gruyere Sauce

A few weeks ago, we traveled to Chicago, a city I recommend you put on your 'don't miss' list!!  It was fantastic.  There is so much going on and so much to do in a very small square area that you will never be bored. I mostly walked every where I went, even if it was a mile away.  We were go, go, go, from the time we got there until the day we left, with museums, shopping, Wrigley Field for a game, and dining.  

On one of the nights, we went to Gibson's Bar & Steakhouse. It was very good, with the exception that for the first time ever, I was served an end piece of Prime Rib.  Normally, at least in my experience, those slices are saved for Medium Well diners.  I was disappointed that it was over done, when I ordered medium, and too dry for my taste.  I should've sent it back but the piece was large enough that I could find medium in the thicker areas and left the medium well behind.  Would I return, meh, maybe not.

The restaurant, as with most steakhouses, is ala carte.  The side dish we chose to share was something we had not eaten before.  Roasted Cauliflower with a Gruyere Sauce.  We couldn't finish it all and my son had 3 servings.  It was relly good.  When were returned home, I made what I thought was close to the dish.  


Preheat oven to 350.  Rinse and cut , 1 Cauliflower to desired size.  Place on a sheet pan and drizzle and coat in 1/4 Cup Olive Oil.  Add S&P to taste.  Place in oven for a total of 20-25 minutes, turing over the cauliflower after 15 minutes, to ensure even roasting.  

While cauliflower is roasting, make Gruyere Sauce.  For béchamel, heat a saucepan over medium heat. Add 3 Tbl Unsalted Butter.  Once it stops bubbling, add 3 Tbl Flour.  Stir for about 3 minutes total, without letting it brown.  Add 1 Cup Whole Milk and continue to cook for about 5 minutes.  It should bubble gently.  

Using a grater box, grate 5-6 oz Gruyere Cheese and add Gruyere to béchamel.  Add S&P to taste.  Add Roasted Cauliflower to the sauce, toss gently to coat, and place in buttered casserole dish.  

Pictured, I took 2 slices of a Rosemary Boule that we had from the previous night, and I tore them into randome pieces and added to the top. Then I sprinkled with Parsley and Paprika.  You can easliy use Panko Bread Crumbs instead.  Place in hot oven for 25-35 minutes, until bubbly and hot.  Let rest for 5 minutes and serve.

For a variation and bolder flavors, you can toss the cauliflower in hazelnut oil before roasting.  Before adding flour to the butter, add a medium shallot, minced, and let this sweat.  Then add the flour and continue on.  For the topping, instead of bread, use roughly chopped hazelnuts.  Season with nutmeg instead of parsley and paprika.


Tuesday, July 22, 2014

Homemade Mozzarella Caprese Salad with Grilled Bread

I made Homemade Mozzarella for the second time.  This turned out better than the first time because I pulled it longer.  It was firmer and held its shape better.  One gallon of milk made 2 generous 8oz portions of cheese.   

For lunch I ate Slices of Mozzarella and Fresh Tomatoes drizzled in Olive Oil and Balsamic Vinegar, topped with Cracked Pepper and Hawaiian Black Salt.  I placed the tomato and cheese on Grilled Slices of Bread.  It was delicious!!

Thursday, December 26, 2013

Yorkshire Pudding

If you haven't eaten this, you must.  If you haven't made this, you must!  It is the most awesome food.  For Christmas, I prepare different meals from year to year, depending on who is coming, but Yorkshire Pudding is always part of the fare.  This is a very simple to make dish and is just spectacular to watch in the oven.

As a child, on Christmas, my mother made this and invariably we would hear hooting and hollering in the kitchen and all go running to see what the commotion was about.  There she was peering into the oven laughing at the Yorkshire Pudding.  It leads you to believe it's alive in there.

Once I hit high school age, I was in charge of the Yorkshire, so that would put me somewhere around 40 years in the making.  By that point, we all had big appetites so I always made 2 which was time consuming, but they always got eaten.

When I serve dinner now a days, I make sure to give the kids a sample of the Yorkshire (for short) and they always love it!

I am going to make it tonight again and will photograph it;  I was just too busy yesterday.  But here is the Yorkshire Pudding Recipe and now the photos have been added.

Preheat oven to 425 with rack in the center (or if using the oven for meat, as soon as it comes out, turn up the oven).  Bake the Yorkshire while the meat rests and is carved.

Add either 2 TBL of drippings from your roasted beef ~ OR ~ add 2 TBL of Light Olive Oil to a pie dish.  Swirl it to coat the bottom.  To a bowl, measure 1 Cup Flour and 1/2 tsp Salt.  To a measuring cup, Add 1 Cup Whole Milk and 2 Eggs.  Give the eggs a stir to break up yolks.  Add the liquid to flour and beat until smooth, about 1 minute or so.  Pour into the pie dish and immediately place in the hot oven ~ by itself.  It will take about 23-25 minutes to bake but begin to check on it without opening the oven after 18-20 minutes.  It won't look like much until that point but you will be amazed.  Once it is a dark golden brown, it's done.  Let it cool for a few moments to set up before cutting.  Using a bread knife, cut into wedges.  The more people the smaller the wedge, but I guarantee, there won't be any left. 

Friday, December 20, 2013

The story of Christmas...Fresh Cabbage turned into Cole Slaw

My tennis team adopts a family each year during the holidays.  This year I got to work directly with the mom/wife.  Her husband grows an incredible garden each season and he gave me a few HUGE cabbages from their winter garden as a token of their thanks!  Isn't that cool?  And aren't these beautiful?

The night I received them, I was roasting a Pork Loin in the oven and decided to make Cole Slaw to go along with it.  Not having a recipe, I made up a cole slaw dressing. 

First, I removed the outer leaves working with the tender lighter green leaves since it was going to be eaten raw.  Next, I removed the stem so I could fill it with water to rinse the leaves.  I turned it back stem side down to let it drain. 

Using a Bread Knife, I cut it in half which further allowed the water to run out.  So beware you have to clean it up because it holds a lot.  I used one full 1/2 Cabbage to make 6-8 side portions of cole slaw.  Using the bread knife, I cut thin slices, creating shreds.  I grated 1 Large Carrot and thinly sliced 1/2 Cup Red Cabbage that we happened to have on hand.  All of this was placed in a wooden bowl. 

Next, the cole slaw dressing.  Using a 2 Cup measuring cup, Add 1/2 Cup Olive Oil.  Add 2 TBL Rice Vinegar and 1/4 Cup Apple Cider Vinegar.  Stir in 1 tsp Kosher Salt and 2 tsp Sugar.  Using a wire whip, add 1/4 Cup Mayonnaise and 1/4 Cup Sour Cream.  Stir to combine and season with  Pepper and Celery Seed to taste.  Add more Salt, Mayonnaise or Sour Cream if needed.

Once you have the flavor the way you want it, pour 1/4 Cup of dressing onto the cabbage mixture and toss well before adding more.  The cabbage should be coated well but not swimming in dressing.  Serve at once for a delicious cold side dish/salad.  The cole slaw may be kept in the refrigerator for a few day already dressed.  I would tend to make what is going to be eaten and make it again.  The dressing can be kept for weeks in the refrigerator.

When I saw the Mom the next day, I gave her a jar of the dressing so she could make cole slaw for her family.  Enjoy and consider adopting a family one year, too!


Friday, July 12, 2013

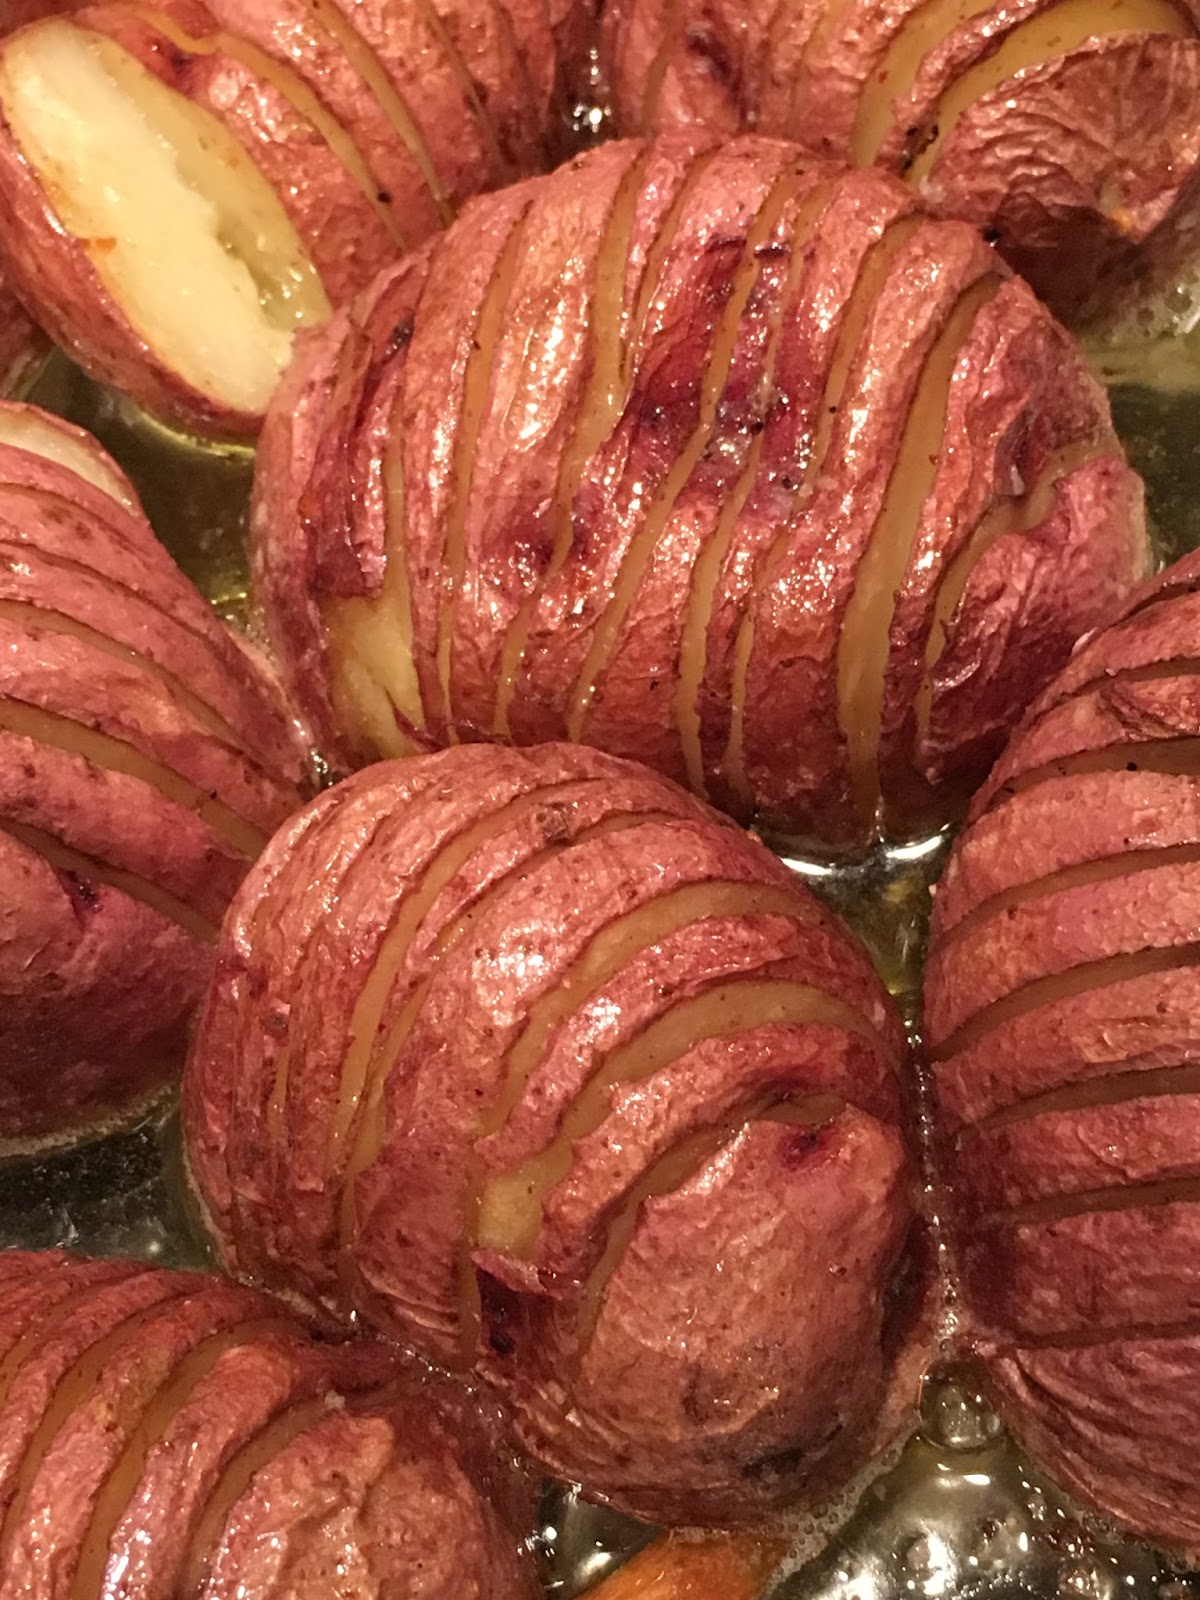
Butterflied (or Butterfly) Potatoes

I am grilling Rib Eye Steaks tonight.  I plan to slice them since they are thick.  I am cooking what my mother used to call "Butterflied Potatoes".  These can be made with any variety of potato that lends itself well to roasting in the oven.  Here is the recipe for Butterflied Potatoes.

Preheat oven to 375.  Cut 4 Large Red Potatoes in half.  Place cut side down and without going all the way through to the bottom, slice each one at 1/4" intervals.

Place the potatoes in a glass dish and drizzle each with 1 tsp Olive Oil.  Sprinkle with S&P to taste.  Add 2 Tbl butter to dish.  Place in hot oven for 40-50 minutes depending on how big your potatoes are.  Every 10 minutes or so, baste each potato with the olive oil/butter mixture.  This will open up the slices of potatoes, like a butterfly.  This dish never fails to take me back to my childhood days, when Sunday dinner was served at 1pm.

Sunday, April 14, 2013

Garlic Chardonnay Grapeseed Oil

I have used Grapeseed Oil to finish a dish and have used it to marinade sliced onions that topped thick slices of grilled beefsteak tomatoes.

Last night I was quickly sauteing Green Beans and decided to us my Garlic Chardonnay Grapeseed Oil.  I trimmed the ends of the beans and heated the pan over medium high.  I added about 1 Tbl of my Garlic Grapeseed Oil and about 1/2 Tbl of Olive Oil.  I quickly sauteed the beans, tossing the pan often.  I only added Kosher Salt at the end.  Wow!  What tender beans that combination made.  They were so flavorful but not over powering.  Of course whipping up a vegetable at mach speed is always to my liking.

I bought 100 mls of Flavored Chardonnay Grapeseed Oil at OIL & Vinegar near Highway 21, Pinnacle Shopping area.  Awesome stuff!  Don't limit yourself to just one, they sell oils and vinegars from all over the world by the 100 mls.

Tuesday, April 9, 2013

Corn on the Cob

It's sometimes the simplest foods that give us the most trouble. Many years ago, I lived in SF, CA and one day on the way out of Napa Valley, I bought fresh corn at a roadside stand.  It has to go down as some of the most memorable corn I have eaten.

I have since replicated the tenderness and the crispness I associate with good corn.  I have also come to recognize, it's not corn that is tough but the way in which it's cooked makes it tough.  Not knowing what went well that time, years later, I began to time the cooking of my corn.  Feeling I was doing something wrong, I increased the time each time with each cooking though it was tough each time.  After going from 8 to 12, then 15, and even up to 20 minutes to no avail, finally I had the good sense to do an about face and cook it for about 3-4 minutes and voila!  That was it!!  It doesn't take long to cook corn.  The smaller the kernels (not the ear) the more quickly it will take.  If you stand and watch it cook, you can actually see it take on a slightly different color and appearance and soon will recognize when it's done.  I highly recommend that when the barbequed meat is resting, that you then begin cooking the corn without getting distracted, meticulously tend to cooking the corn and at 50 cents an ear, you don't want to mess it up.

Not that I recall a corn shortage in my life until last year's drought, but I admit, I even bought corn with slightly dry husks for my summer barbeque.  So long as it's not moldy, fresh corn will always cook to a perfection. 

When looking for corn, I don't open each one.  I go by the weight of it in my hand and I select the heavier ears.

Once home, I like to peel it in advance and allow it to warm to room temperature before cooking.  I boil water in the largest pot I need to allow for the corn to float. Once the water boils, add about 1 Tsp of Salt.  Add the ears, 1 at a time.  When cooking more than five ears, I rotate the ears, pushing them down one by one and allowing a new ear to the top.   Even for four ears, I still spin them to ensure all side are exposed to the rolling boil.  I cook the ears until they take on the characteristics that they are done - which is only about 3 minutes.  For serving, I place them on a towel lined plate or platter and fold it over leaving the ends exposed.

For me I simply add butter and salt and have little reason nor incentive to do something otherwise.  Hopefully with the help of my trials, you will have perfect corn, too!!  Let me know!

Friday, October 19, 2012

Delicious Baked Beans

This summer I was in NY for an extended stay.  On one of the nights, my sister baked beans and I slow roasted ribs.  What a great meal!
Tonight it is finally "cool" and the humidity is low.  The guys are fishing in one of our ponds.  As the sun goes down we are going to light up the limbs I collected after Isaac blew in.  I have hotdogs and buns to cook over the fire.  Dessert is going to be S'mores.  The beans are really healthy and can easily be changed up to suit a vegetarian.  To my sister C, I took the liberty to make a little change.  I added 1 heaping tablespoon of stone ground mustard and I switched to apple cider vinegar from white vinegar.  I just love everything about these!

Baked Beans Recipe:
Preheat oven to 350.  Cut 1/2 lb Bacon into 1/2" cubes and cook until just about done.  Dice 1 Small Onion and add it to the bacon and cook together.  While that is going, open cans, strain and rinse, and place in a bowl.  I used all Bush's Brand and they come in 15 or 16 oz cans.  1 Can Black Beans, 1 Can Red Kidney Beans, 1 Can of Butter Beans.  To this add 1 Can of your favorite Baked Beans.  I like the Bush's Boston Recipe and it was a 29 oz can.  To this mixture, add 3/4 Cup Brown Sugar, 1/2 Cup Ketchup, 1 Heaping Tbl Stone Ground Mustard, and 2 Tbl Apple Cider Vinegar.  Add the cooked Bacon and Onion and stir to combine.  Add to a casserole dish with a lid.

Bake covered at 350 for 1 hour stirring a few times.  This can be assembled in the morning and if you work, have a family member get the oven on and bake it so it's ready at dinner time!  For vegetarians, omit the bacon and use vegetarian style baked beans.  Great with fried or roasted chicken, ribs, or hotdogs over an open fire!

Friday, September 28, 2012

Individual Oven Baked Eggplant Parmesan

Looks simple enough, right?  I made up this Oven Baked Eggplant Parmesan recipe because I wanted individual eggplant Parmesan that didn't absorb lots of olive oil.  Eggplant is like a sponge and if you cut it and immediately cook it, you'll have to use lots of oil.  When you salt it before cooking and let the water drip out, it will cook without much oil at all.  If you are short of time, this is a good alternative.

Preheat Oven to 375.  Line a sheet pan with parchment paper.  To 2 flat bottom bowls, for example pasta plates, add 1/4 Cup Olive Oil to one and 1/2 Cup Italian Seasoned Bread Crumbs to the other.  Peel and cut 2 Medium Eggplants into 1/2" slices. Dip the Eggplant into the oil then into the bread crumbs.

Place on the sheet pan.  Lightly season with Salt and Pepper to taste.  Place in the oven for 40-45 minutes.  About 1/2 way through cooking, flip the eggplant over and bake until it is golden brown.  Up til now can be done up to a few hours in advacne.  When ready to eat,  add 1 Tbl of Marinara and top with 1 Tbl  Mozzarella Cheese.  Place back into the oven until the cheese is melted or you can load it up and bake until the cheese is brown.  These can be served as a side dish, placed on top of pasta with marinara, or even served on a soft roll and eaten as a sandwich.  All in all, for my first crack at, they were quite tasty!!


Sunday, August 5, 2012

smitten kitchen's Zucchini Fritters, take 2.

I made these again for the 2nd time in 3 days.  Truly they are that good.  I followed the original recipe in the previous post and made these few adjustments.

  • I used 3 Zucchini as opposed to 2 and this also made 12 Fritters, a better number for the 3 of us.
  • When I was at the CIA this summer, I bought cheese cloth, so this time I squeezed the water out of the grated zucchini in small batches using the cloth.  I got a drier result which made these cook up beautifully.  
  • I decided not to add additional salt to my batter, however, on turning each fritter I sprinkled a bit of Kosher Salt to each Fritter and that was tasty.
  • I heated an oven to 350 and placed the finished Fritters on a rack lined sheet pan so they were warm when we ate and still crispy on the edges.
Safe to suffice, I am happy with the adjustments I made!  This recipe is a keeper for us!!

Thursday, August 2, 2012

smitten kitchen's Zucchini Fritters

NOTE: This was my first go at it but I made adjustments to the recipe in my next post.

I keep running across zucchini fritters here and there in magazines.  My sister, C, posted a picture of smitten kitchen's fritters on Facebook last week, so I bought 2 zucchini yesterday.  The recipe made only 8 fritters and we left 3 for my husband since he will be hungry when he returns from tennis.  Guess who only got 2?  You got it, me!!  Honestly we could've eaten all 8, cleaned up, and he never would've known what he missed, but we couldn't do that.  Instead, I am going to make them again in the next day or so.
As I flip from sk's photo of her fritters and I evaluate mine, mine are not the same.  I believe I can use this same recipe using 3 Zucchini's to get a result closer to hers, a little crispier and with less dough.  One of the culprits is the SE Louisiana humidity and we have enough for the whole country, for a month running.  It completely changes any recipe using flour.  Another important factor is to not mix the batter together until you are ready to cook.  In letting the mixed batter sit for 5 minutes while I was preparing the rest of the meal, I got a bit more of a tempura result and you can clearly see the puffiness of my fritters as opposed to hers.  I can assure you though, they were tremendous just the same.  One change I made is, I like herbs in my fritters so I added Oregano and as I frequently do, I used shallots instead of scallions and of course in a pinch, onion will work, too.
My last thought is that these are perfect for making ahead for an appetizer or side dish.  Let them cool on a rack and refrigerate.  When ready to serve, reheat oven to 350 and lay on a rack over a sheet pan.  Lay them out in a single layer, do not shingle, and warm for 15-20 minutes until hot and crispy.
I didn't follow the recipe verbatim, but here is what I did.  Remove the ends and cut 2 Zucchini in half so you have 3-4" lengths.  Using a V-slicer (rather than a grater box or processor) cut zucchini into strands on the smallest cut.  The strands were 3" x 1/8" x 1/8".  Place the zucchini in a colander and toss with a 1 tsp of Salt.  Let this sit for 10-15 minutes to release the water.  In small batches, using your hands, squeeze out the excess water and place back in the bowl.  While the zucchini is doing it's thing, get the next steps ready.  Either finely slice scallions (which sk did) or mince 1 Medium Shallot (which I did) and place in a small bowl.   Heat an empty skillet over medium. In a bowl, beat 1 Egg.  To another bowl, measure out 1/2 Cup Flour and sift it with 1/2 tsp Baking Powder...you can also just stir with a wire whip to incorporate them together.  Add 1/4 tsp Salt, freshly ground Black Pepper, and optionally (my addition, not smitten kitchen's) 1/2 tsp Oregano or a seasoning of your choice, ie Thyme to the flour mixture.
Add Canola Oil to coat the bottom of the skillet.  Mix together batter adding the shallots and the egg, stirring to coat the zucchini.  Lastly, add the flour and stir to combine.
Add spoonfuls to the hot pan and flatten slightly so they are an even thickness and will cook evenly.  Once golden brown, turn just once.  I mixed up a quick topping of 2 Tbl ricotta and 2 Tbl Sour Cream.  I added Smoked Paprika, Oregano, and Salt and Pepper to taste.  Then I blended in 1 Tbl Olive Oil.