Showing posts with label Breakfast. Show all posts

Wednesday, August 5, 2020

Three Mushroom Tart

I made this a few times after meeting my husband but I believe the last time may have been a distance birthday.  It was the weekend my husband met my parents at their NC home.  A few of us drove/flew there in order to attend a local symphony concert where my Dad, dressed in his tux, was to direct the symphony in Radetzky's March.  At the time, we didn't know what song so it was all a surprise to us when he appeared on stage at the end.  Back story is that earlier that year he attended a silent auction and won the bid to  conduct during an evening performance.  It was hilarious because during the piece, he stopped conducting and turned to face the audience and the audience roared with laughter as the symphony played on, not missing a beat.  It was all good fun.  That weekend is still a very fond memory of mine.  But that Sunday was my birthday and we had these tarts for a mid-day meal.  I recall that day as if it were yesterday.

This hails from April 1996 Gourmet Magazine, a well used issue of mine.  When I recently set out to make this, I couldn't recall where the recipe came from and looked for hours this past weekend until I found it.  I forgot I have a directory of all the recipes that I make (or would like to make) from my magazine collection.   But I was literally thumbing through the index of dozens and dozens of magazines scanning for it until I found it.  The directory is handy in that it is in alphabetical order and lists exactly where to find a recipe in my hundreds of magazines.  

So here's how you make this.  

Thaw a 1 Package of Puff Pastry or if you are talented make your own.  I have to admit, I've been watching The British Baking Show Master Class and plan to make my own soon.  That'll be for another day.

Read the recipe through and do all your prep in advance.  

Make sure you have a variety of 3 mushrooms.  You need at least one to have an appearance similar to enoki, or in my case Wegmans opened up nearby and I spied Beech (my new favorite).  

For the mushrooms -  8-10 Button, 8-10 Baby Bella (or Shitake), 6 oz Beech.  Pick out 4 of the best of the Button and Baby Bella that will be sliced for the top.  Take the rest and clean, trim the stems, and dice.  You should have about 3 Cups of diced Mushrooms total.  

To a skillet, add 2 TBL Unsalted Butter.  Add 1/2 Cup Minced Shallots and cook over medium heat to sweat, about 3 minutes.  Add diced Mushrooms, 2 tsp Worcestershire Sauce, Salt and Pepper.  Cook over medium high heat until the liquid is evaporated.  Add 1/4 Cup Sherry with 1 TBL Balsamic Vinegar and cook until the liquid evaporates.  Place this mixture in a bowl to cool.  Can be made in advance up to this point.

Preheat oven to 425.  Roll Puff Pastry and place in a rectangular tart pan.  

In a measuring cup, combine 1/3 Cup Heavy Cream with 1 Egg.  Add this to the cooked mushroom mixture.  Pour this into the prepared tart pan.  Slice the Button and Bella mushrooms into 1/4" slices and arrange them in rows along the long sides of the tart pan.  Place the Beech mushrooms down the center.  Brush with the Juice of a Lemon.

Place in hot oven and cook for 20-25 minutes until deep golden brown.  Don't open the oven door for the first 20 minutes.  Rotate the tart pan once and cook for final 5 minutes.  The pastry and filling should puff to a height taller than the tart pan.  Remove tart from oven and let rest for a few minutes before removing the rim.  Let rest another 5 mintutes and slice into 3-4 pieces.  Each tart will feed 3-4 depending on what else you serve.  A salad of some sort is highly recmmended.  


Monday, February 4, 2019

Fresh Pineapple

Fresh Pineapple is in season!  I know you can get them all the time but they are particularly good beginning now and under $2 each if you shop around.  I bought this one at Walmart for $1.78.   Sometimes I spirialze them and occassionaly I like large chucks eaten by itself.  I could tell by looking at it that it would be good with a firm looking skin and dark, hydrated and healthy looking crown. This is the second one I bought in a week.  It was ready to eat immediately and seems to be at it's peek!  They are in season beginning now through July!  

Friday, January 11, 2019

Emeril's Breakfast Stratta

My Mom used to make a breakfast stratta for certain family events.  I realized at Thanksgiving, during a conversation about Christmas morning breakfast traditions, that I have never made her stratta or any stratta for that matter.  

This December, while watching Rachel Ray, Emeril was a guest and what do you think he made?  A stratta! But it was tall because it was made with large cubes of bread rather than sliced bread.  It was the traditional "make the night before and bake in the morning" affair so I dedcided to give it a try.   Wow, it was delicious - and of course it doesn't hurt that it is made with Gruyere Cheese!

He calls his a Morning Breakfast Bake and he uses Canadian Bacon.  My family prefers Sausage so I crumbled sauage patties instead.  I did omit the garlic because I don't like garlic for breakfast but for brunch or "we're having breakfast for dinner" I would probably add it.  Feel free to swap out Shallots for the Onion.

Heat a large skillet over medium heat.  Add 1 TBL Butter and to it add: 6 Crumbled Breatfast Sauage Patties and cook for about 5 minutes while stirring often. Add 1 Small Onion Diced and 1/4 tsp Salt and cook until the onion has sweated, about 2-3 minutes.  Have ready 1 pound of prewashed Baby Spinach.  Add half of the spinach to the skillet and once it is reduced in volume, add the other half.  Once it is wilted, remove the skillet from the heat.  

Butter a 9" x 9" x 2 3/4" - in other words tall baking dish.  Cut a Loaf of Bakery Bread (some suggestions are Italian, Sour Dough, Boulle or my favorite is Pane di Casa if you have a Harris Teeter) to 1 1/2 " cubes.  Grate 8 oz. Gruyere Cheese.  

Add the bread to the dish and top with sausage topping and grated cheese - preserving about 1/2 Cup of Gruyere for the top.  It works well to get the topping between the cubes of bread.  Just keep building until all the topping is gone and 3/4 of the cheese is used.   

In a bowl beat 10 Eggs,  2 Cups 1/2 & 1/2, 1 Cup Milk, 1/2 tsp Pepper, 1/2 tsp Nutmeg.  Gently pour egg mixture over the bread and toppings.  You may have to re-distribute any topping that got disrupted.  Press gently so the bread comes into contact with the egg mixture.  Top with about 1/2 Cup of preserve Gruyere.  Cover and place in refrigerator overnight.  

In the morning, remove dish from the refrigerator 30 minutes before baking.   Preheat oven to 400.  Bake incovered for 35-40 minutes until puffed and golden brown and "set".  Let rest for 5 minuted before cutting into generous squares.  Serve with fresh fruit.  If you want to go crazy,  serve Vermont Maple Syrup along side of it for a light drizzle.  

Hopefully this dish will be part of your holiday tradition or your favorite "we're having breakfast for dinner" meal on that cold January night!  Enjoy!!

Sunday, June 15, 2014

Lemon Blueberry Pancakes


If you like light lemony things, you will love this recipe!!  We have 6 Blueberry Bushes in our yard that must be about 18-20 years old.  They produce an abundance of blueberries in spring when we have winters of heavy rain and this year was a doozy.  They were 3 weeks late this year, on account of a cold winter, but they were abundant!!

On Father's Day, we were getting the first of our blueberries and I usually have a bag on lemons on hand at any given moment, so that's was on the breakfast menu.

I took my Mom's Buttermilk Pancake recipe and amended it by substituting some of the Buttermilk for lemon juice.  The results were tasty.  The surprising part was the fact that instead of 12 pancakes it made 18.  The difference was air.  When the lemon hit the baking powder it expanded in such a awesome way, that the pancakes were light and fluffy.  The typical golden brown outside became sightly caramelized because of the lemon and had a really good flavor. 

The first round was served with Vermont Fancy Grade Syrup but it conflicted somewhat with the lemon.  In the end all they needed were a smear of butter and a dusting of powder sugar.  Wow delicious!!

Preheat your griddle to 375.  In the meantime, place the dry ingredients into a bowl.  1 Cup Flour (or mixture of flours ~ I used all-purpose and whole wheat totaling 1 cup), 1 TBL Sugar, 1 tsp Baking Powder, 1 tsp Baking Soda, 1/2 tsp Kosher Salt, the Zest of 1 Lemon.

I was given a neat juicer for squeezing lemons and limes.  Cut the zested lemon in half and have handy the juicer.  

To a measuring cup add, 3/4 Buttermilk, 2 TBL Canola Oil, and 1 Egg.  Give it a stir.  Juice both halves of the lemon into the mixture.  Add the wet ingredients to the bowl.  Stir with a wire whip until smooth.  Fold in as many Blueberries as you want up to 3/4 Cup.  You will see the batter expand right away.

Spread Crisco on the griddle where you intend to place the pancakes.  I use Crisco because butter has a very low smoke point and will burn and oil doesn't stay put.  Pancakes need to set up and brown quickly and the higher heat helps them rise.  I have found that Crisco offers better results. 

Ladle the desired size, cooking 6 at a time.  I like a short stack of 4 pancakes so I use about 1/4 cup of batter per pancake.  Because of the light nature of this batter, the berries will settle on the bottom.  When ladling, you have to go to the bottom for the fruit.

You are going to turn the pancakes only once.  Once they look done around the edges and the top batter is still wet, flip quickly.  I find I use less butter if I lightly, without deflating the pancakes, add butter to the cooked side at this time.  Once the second side is cooked to your liking, place a stack on a plate and dust with Powdered Sugar.  Serve immediately as they come off the griddle.

NOTE: for a few variations, you can add toasted Nuts or Oatmeal to the pancakes at this time or for a decadent breakfast, Whipped Cream.  In the winter when Raspberries are in season, substitute them! 


Tuesday, January 28, 2014

Cheesey Buttermilk Biscuits

This is actually from Martha Stewart's Hors D'oeuvres Handbook, which by the way, is an excellent reference if you like to cook.  This is her White Cheddar, Sage, and Buttermilk Biscuits, p 350.

So the story today is that here in the deep south, we have 2 days off from school because of a threat of wintery and icy conditions.  So for me that is code for 2 fulls days to bake and cook.  Yesterday, I bought a few things I needed in order to get cracking and first up is Cheddar Buttermilk Biscuits and scrambled eggs.  I don't have sage so sans the sage.  I'm not sure my son would like it anyway and he needs to put meat on his bones!!

This recipe goes together in the time it takes to heat the oven to 400, so turn it on first.  Make sure 1 Stick Unsalted Butter is sitting out so it becomes cool, but not room temperature.   Line a sheet pan with parchment paper cut to fit.

To a bowl add, 2 Cups Flour (I used 1/2 Cup Whole Wheat Flour and 1 1/2 Cups All Purpose Flour).  To that add 4 tsp Baking Powder, 1 TBL Sugar, 1 tsp Kosher Salt, 1/2 tsp Cream of Tarter.  Stir with a wire whip to combine.

Cut Butter into quarters the long way and then the short direction making 1/2" cubes and drop in flour mixture.  Cut with a pastry blend.  If you don't have one, improvise using 2 knives in a cutting motion in opposite directions.  This should resemble coarse cornmeal.  Stir in 1 Cup Cheddar Cheese.  Today I used 4-Cheese Mexican because it's what I have on hand.  Add 2/3 Cup Buttermilk.  Stir until just combined.

Dump dough onto a floured pastry cloth and shape into a rectangle.  Fold the dough onto itself, top 1/3 and bottom 1/3.  (As you can see by the photos, by dough has some ever so visible layers as a result of the folding).  Re-shape into a rectangle.  For shaping, I place my hands outside of the pastry cloth and shape using the cloth so my hands don't heat up the butter.  Roll the dough so it is an even consistency, a healthy 1" thick, while shaping til you are satisfied.  That is all the handling this dough should get or it will become tough. 

I bought this cool rectangle mold in Austin last year and thought I would make a new shape.  Once cut, place on parchment and brush with 1/2 & 1/2 and dust with Sanding Sugar.  Bake for 15-18 minutes until golden brown. 
Let rest a minute or 2 and devour at once!!

Wednesday, July 24, 2013

Homemade Mozzarella

My sister, D, gave her daughter a cheese making kit a few years ago and they have been making Mozzarella Cheese from scratch since.  I finally bought a kit and am going to give it a go.  I am really excited and hope you are, too! 
First step is to find "Pasteurized Milk" since I can't use Ultra-Pasteurized Milk." I found the grocery about a mile from my house sells pasteurized whole milk, so I bought it yesterday.

Yeah!  This morning I made the cheese.  First I had to watch a video a number of times because there are critical steps of stirring, timing, and temperature to be mindful of.  The kit I have is from Ricki Carroll, about $25 online.  It will turn 40 gallons of milk into cheese.  Each gallon makes about 16-20 ounces of finished cheese, though that is a rough estimate without weighing it.  If you venture into this, you will find that you work with One Gallon of Whole Milk at a time.

Pictured is the finished product ready to eat.  Next time I know to pull the cheese more times than I did to make it more elastic and therefore more stringy.  I also learned to have an ice bath ready so once the cheese is formed to my liking, I have it ready.  My first two balls were still warm and flattened as they cooled on a plate.  I decided to eat one of those "mistakes" first.  All in all, it took me longer than the 30 minutes but next time will be faster.  And all and all, it is delicious!!

Wednesday, March 6, 2013

Apple Danish and Cream Cheese Apple Braid

Recently my son came home from school and told me he tried a danish for the first time and loved it.  I thought I would buy a few apples and try my hand at danish using puff pastry.  These are both my own creations.  They turned out quite well but in actuality the danish should have a yeast dough.  But for a short cut method, perfect to make for a ski or beach vacation, this would be an option for breakfast.

Thaw 2 Sheets of Puff Pastry.  Dice 2 Medium sized Apples (I used Pink Lady).  Melt 2 Tbl Butter and 1 Tbl Light Brown Sugar until bubbly.  Add the diced apples and cook for about 5-7 minutes until they will become soft. Continue cooking until the moisture to begins to evaporate.  Remove from heat. 

  • FOR THE DANISH (This will make 16):
Preheat oven to 400.  Fit Parchment Paper to a sheet pan.  Sprinkle the Puff Pastry with Sugar and roll it out.  Flip over the pastry and do the same on the other side keeping its rectangular shape.  Roll up the Pastry along the long end.  Cut in half, cut halves in half, and lastly, cut quarters in half resulting in 8 pinwheels.  Using a rolling pin gently roll the pastry to flatten.   Place the pinwheels in the parchment paper.  Score a circle on each pinwheel about 1/2" from the edge.  Add 1 Tbl of cooked diced apple to the center.

Dust with sugar and place in oven to bake for 20-25 minutes until dark golden brown.  Cool slightly before handling.


  • FOR THE BRAID (This will make 2):
Preheat oven to 400.  Fit Parchment Paper to a sheet pan.  Sprinkle the Puff Pastry with Sugar and roll it out.  Flip over the pastry and do the same on the other side keeping its rectangular shape.  Using a 3oz Package of Cream Cheese, add about (18-20) 1/2 tsp dollops of Cream Cheese randomly.  Add 1/2 of the cooked Apples here and there, covering the pastry.


Roll up the Pastry along the long end. Carefully, and with a very sharp knife, Starting about 1/2" from the top, cut away a 1/3 width of the pastry on the right.  Cut the remaining 2/3 in half.  The result should be 3 similarly sized pieces.


Braid, right over the center, left over the center and so forth until you get to the bottom.  Wrap around the ends to create a ring.  Place the ring on the parchment paper.


Sprinkle with sugar and place in the oven to bake for 20-25 minutes until dark golden brown.  Cut into slices and serve warm.

Monday, February 25, 2013

Chobani Yogurt

I am not sure which is better, Chobani Yogurt (might I add, non-fat) or the Chobani success story.

Unless you have your head in the sand you must have heard of Chobani Yogurt.  They supplied the Olympic athletes and their ads ran during the 2012 Summer Games.  They caught my attention but I didn't buy any.  Shame on me.  A few months ago, I saw the founder of the company in a 60-Minutes interview that was both endearing and intriguing.  The interviewer tried it for the first time on the air.  OK, his reaction moved me to buy it.

Soon after, I was at Sam's and noticed they sold a 12 pack with 3 flavors, so I bought one.  I tried it out when I walked in the door and it was nothing less than outstanding.  I am a yogurt eater and now I am yogurt hooked.  Not just any yogurt but Chobani Yogurt.  I made my homemade granola and ate the entire box within a few weeks.  Then I bought another one!

You surely have noticed that now all yogurt makers are coming out with their new (and similar) packaging and their claim to be Greek Yogurt.  I bought Yoplait after scanning the Chobani flavors and seeing Key Lime thought I would get one.  I didn't even notice it wasn't Chobani.  But when I opened it just now, I thought, ok Chobani, you didn't fill this one up.

When I folded over the yogurt, (the proper mixing method), looking for the Key Lime, there wasn't any.  I thought, hmmm, then I tasted it and it was just like, well Yoplait, the one I have eaten for years.  A bit runny, not creamy or thick.  That made me check the outside of the package to find, it wasn't Chobani.

The portion Chobani gives is generous.  I wonder if they give you 6 oz of yogurt and add the filling after as a sort of lagniappe.  It is the creamiest and has the most delicious flavor.  When I noticed that the Yoplait portion was scant, it prompted me to check the portion size.  The Chobani states 6 oz and lo and behold, the Yo-Plait 5.3 oz.  But just to fake out the consumer, if but only once, it's in the same size cup as the Chobani. 

So all you yogurt eaters, if you haven't tried Chobani, you must!  Check out my fresh Granola Recipe, add crainsins and/or fresh fruit and you will have a huge non-fat breakfast that will keep you full until lunchtime!

Just for good measure, Chobani has a live culture to promote good digestive health, too!  Wow, addicting stuff.


Monday, December 31, 2012

Raspberry Turnovers with Toasted Almonds & White Chocolate


This is a simple and delicious recipe.  I made these to bring to a New Year's Eve party.  I love to mix fresh fruit, nuts, and chocolate in my desserts.  An added bonus, kids can make these!!  This recipe will make 18 miniature turnovers. 
First, thaw 1 Package of Frozen Puff Party Sheets for at least an hour.  Using a pizza wheel, cut the sheets into 9 squares.  You can either roll the dough and cut -or- cut and roll.  The idea is you need squares.  I like to use a traditional French Rolling pin and after years of practice, I can use the tapered design to add pressure when needed to manipulate the shape I need.

While the dough is thawing get your work station ready.  Toast about 1/2 Cup of Sliced Almonds in a 1/2 Tl Butter until browned and fragrant.  Rough Cut 2oz White Chocolate.  Count out Fresh Raspberries, 1 large or 2 small per turnover, and lightly press down with the tines of a fork to flatten the berries.  Pour 1/2 Cup Heavy Cream in a dish and have a clean pastry brush ready.  Place 1/4 Cup Oatmeal in a small dish.  Preheat oven to 400.  Cut parchment to line 2 sheet pans. 

Once dough is rolled to a square, brush the outer edge with cream.  Stack a berry, a piece of chocolate, and a few nuts in 1 corner, inside the cream.  Fold the dough on the diagonal (without poking a hole in the dough.)  Using the tines of a floured fork, press the edges so they are firmly closed.  Set turnover on the parchment lined pan leaving at least an inch between all sides.  Brush the top with cream and add Sanding Sugar or in my case, Oatmeal...or even both!

Bake in the center of the a hot oven for approximately 12-15 minutes or until golden brown.  Let them cool before trying to store them.  If you are going to eat one right away remember the fruit is very hot but they are delicious right out of the oven.  Again, the bonus, making these with children will teach them counting and geometry skills!


Wednesday, October 31, 2012

Teacher Treats for Halloween

Everyone who signed up for the food committee at school was asked to bring something for the teachers today.  Since they will likely get a lot of "treats" and some teachers might be looking more for a food suitable for breakfast, I decided to make my Stuffed Apple French Toast.

Yesterday I bought loaves of French Baguettes, a bag of Honey Crisp Apples, and a dozen Eggs.  I have the rest of the stuff in my kitchen already.  I have one batch in the oven with one more to go.  This will net a few dozen french toast squares.  When it comes out, I am going to glaze it with melted butter with Fancy Grade Syrup stirred in.

NOTE: I used an 8" X 11 1/2".  Ended up needing 7 Eggs on account of the larger dish because the baguette cubes required more egg than sliced sandwich bread.   But the recipe is on my site if you search Stuffed Apple French Toast.

Friday, October 12, 2012

Farm Fresh Eggs

It was my lucky day!!  I went to Simplee Gourmet in hunt of a new pastry cloth.  At the door was a young man, a member of 4-H, selling the eggs his chickens laid.  A dozen eggs for $3.50 which is a great price....and just look at these!  They are most the beautiful eggs I have ever seen.

The following morning, I scrambled a few and they were incredible.  I will have to let you know the hours you might find him there so you can buy some for your own kitchen.

The second day I fried one!  So delicious!!

I didn't partake, but Covey Farms had a farmers market of vegetables set up for purchase.   Meanwhile, a chef was behind the line cooking something that smelled delicious.  If you haven't visited Simplee Gourmet lately, (Hwy 21 - Covington, LA) you are missing out.  Their inventory of kitchen gadgets, cookware, serving platters, cutlery, dishes, glassware and more, has grown!  I can get lost in a place like that.

Friday, November 4, 2011

Zucchini Craisin Muffins Recipe

I made up this batter recipe for Zucchini Bread.  I adapted that recipe for muffins.
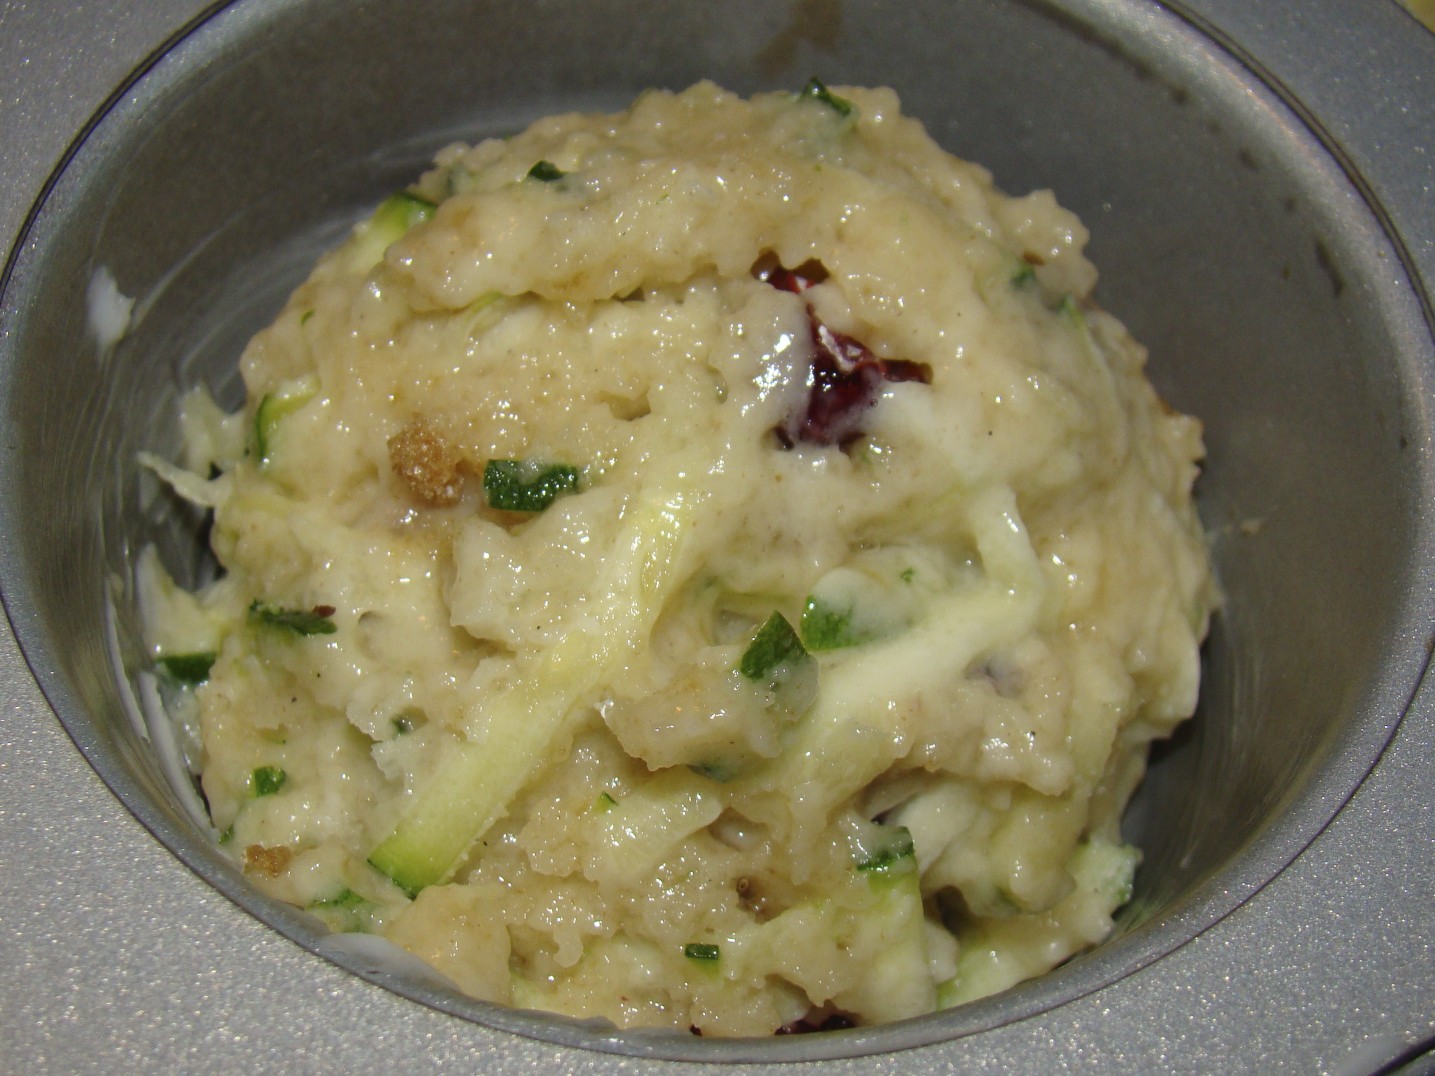
Preheat oven to 375.  Grease 2 muffin pans or use muffin liners.  In a bowl, mix together 3 Cups Flour, 2/3 Cups Packed Brown Sugar, 1/3 Cup Sugar, 12oz Craisins, 2 tsp Baking Powder, 1/2 tsp Baking Soda, 1 tsp Kosher Salt, a touch of Cardamom, and a few grinds of fresh Nutmeg.  Hand mix with a wire whip to combine ingredients.  Grate 2 Medium sized Zucchini either on a grater box or with a mandolin.  Add to bowl.  Set aside.  In a 2 cup measuring cup begin stacking these ingredients, it'll save on the cleanup!  1/2 Cup Canola Oil, 1/4 Cup Milk, 1/4 Cup Sour Cream (add sour cream to the cup until line comes to 1 Cup), and 2 Eggs.  Mix with a fork until the egg is broken up and the sour cream is distributed.  Add the wet ingredients to the bowl and mix with a wooden spoon or rubber spatula until just combined.  The batter will seem a bit sticky and possibly slightly dry but not to worry, zucchini is a watery vegetable and will make it all good in the end!
Scoop batter using a 1/4 Cup Scoop into the muffin pan.  Makes 22 muffins.  I always leave a corner open on each pan in order to handle the pan without destroying a muffin.  Place in oven and bake for 18-20 minutes.  You can serve this with Orange Flavored Cream Cheese by combining the Zest of 1 Orange into 8 oz softened Cream Cheese.  Serve muffins warm.

Wednesday, October 26, 2011

Mini Wonton Wrapper Quiche Recipe

These are just perfect as an appetizer, snack, or buffet breakfast / brunch.  My tennis team acknowledged Breast Cancer Awareness last week and this was one of the things we ate.  I baked them in the morning and brought them warm, still in the pan.


Here's what I did.  NOTE: This recipe makes 24 quiches. There are 48 Wontons Wrappers in a package so this can be doubled to make 48 quiches.  

To get a jump on it, the night before, cook 6 slices Thick Slab Smoked Bacon until crisp and grate 1 Cup Emmentaler Cheese.


The following morning, first take the wontons out of the refrigerator so they warm up and become pliable, otherwise they will crack.  Preheat oven to 350.  While oven is warming, do some prep.  Melt 1/2 Stick Butter.  Crumple the bacon.  Cut 12 Grape Tomatoes in half the long way.    Brush all the cups of a mini-muffin pan with the melted butter.  To a bowl, (I used a batter bowl for easy and quick pouring) add 5 Eggs, 1/2 Cup 1/2 & 1/2, 1 Tbl Flour, S&P to taste.

Keep the wontons in a stack and cut all 4 corners off.  Working 1 at a time, brush each wonton with butter and arrange it in each of the cups, butter side down. Fill each cup with Egg Mixture.  Add 1 tsp of Grated Cheese, crumpled Bacon (you have enough for 1 slice per 4 cups) and top with a Grape Tomato, cut side up.  Place in hot oven and bake for 18-20 minutes.  Serve at once straight out of the pan!

Sunday, July 17, 2011

Flour Tortilla French Toast Recipe

Long on flour tortillas?  They are perfect for a french toast breakfast or brunch, snack, or even dessert.  Many years ago I had no bread and wanted to make french toast for breakfast.  I quickly improvised and made this delicious version.  I haven't made them in years but decided to make them this morning to add to my blog.  They are simple enough, here's what you do.
For every 5 small tortillas the following quantities will work well.  To a flat bottomed bowl, add 2 Eggs, A Pinch of Salt, 2 Pinches of Sugar, 1/4 tsp Cinnamon, and 3 Tbl Milk.  Feel free to add a Splash of Orange Juice if you have if handy.  Figure on 2 Flour Tortillas per Person.  Fully heat a skillet on medium heat.  Add a 1/2 tsp of Crisco.  Do not use butter or it will burn.  Quickly coat both sides of a flour tortilla in the egg mixture and add it to the skillet.  Turn once it is golden brown and cook 2nd side.  Roll into thirds and top with Vermont Fancy Grade Syrup, Fresh Fruit and Toasted Nuts.  Serve immediately.  For Vermont Maple Syrup, call Therrien's Sugarhouse in Brattleboro, Vermont 802.257.4013.  Their prices are excellent!

Saturday, October 23, 2010

Fun Pancakes

Last week I came across a Yahoo article about a guy who makes fun pancakes for his 3 year old.  Now this guy is super talented and is an artist by profession, and I can assure you I am neither.  He places his batter in squeeze bottles and draws on the griddle to make all sort of really neat things.
I bought a few squeeze bottles to give it a whirl.  I mixed up 3 colors, green, brown and orange.  I made my usual pancake batter (already on this site) thinning it out with whole milk so it could be squeezed through the opening.  I placed batter into the bottles and shook in the colors.  Here are a few photos of the pancakes I made.  This is really fun.
My batter was a little too thin especially after adding the color and they spread more than I wanted.  Next time I know the batter will squeeze out without it being quite as thin.  Also, if you draw big pancakes, you will have a dickens of a time flipping them.  My pumpkin was too big and the batter spread making tough to flip.
If you have a sleep over for girls, I think this would be a really fun breakfast for them.  My son normally eats 1 or 2 pancakes and he ate equivalent to 4-6 made this way!

Thursday, October 21, 2010

Granola and Fruit Served in a Waffle Bowl

I play tennis in a league and the home team provides the snacks for all of the players.  We pass around the duties throughout the team and there are always good things to eat where ever we play.

This week was my turn and yesterday we got rained out so I have all this food to eat!  Here is my idea for the Yogurt, Homemade Granola (recipe in this blog already), Ocean Spray Craisins, and Bananas all served in an edible Joy Waffle Bowls.  This is a prefect serving vessel for many occasions and will work nicely out on the courts.   Will have to try it again the next time we are the hosting team.

Saturday, June 26, 2010

Apple Topped Pancakes

I just made this up this morning.  Wow, what a hit!  My son wanted a warm apple topping on pancakes for breakfast.  I knew we had an apple, so that's what we made.  Heat up a small sauce pan over medium heat while you peel, core and dice 1 Apple.  Add 1 generous Tbl Butter to the pan.  Saute the apple.  Sprinkle in Cinnamon, add 1 Tbl Brown Sugar and a dash of Vanilla.  Preheat griddle. 
This is my Mom's Pancake recipe.  Beat 1 Egg, Add 1 Cup Buttermilk, and 2 Tbl Canola Oil.  Add 1 Tbl Sugar, 1 tsp baking Powder, 1 tsp Baking Soda, 1/2 tsp Salt.  Stir til smooth.  Add 1 Cup Flour.  I used 1/4 Buckwheat flour and 3/4 Cup Flour.  Stir and cook on hot griddle.  Top with apples, whipped cream and a sprinkle of cinnamon.  Eat immediately!

Wednesday, June 23, 2010

Blueberry Banana Pecan Bran Muffins

This is the Nabisco recipe I use (with some changes) but I like All-Bran cereal better.   Preheat oven to 400.  In a 4 Cup measuring cup add 1 Cup Whole Milk and 1 1/4 Cups Bran Cereal.  Let this sit for 5 minutes.   In a bowl, measure the 1 1/4 Cup Flour, 1/4 Cup Brown Sugar, 1/4 Sugar,  2 1/2 tsp Baking Powder, 1/2 tsp Baking Soda, 1/2 tsp Salt.  Add to the measuring cup, 1/4 Cup Canola Oil, 1 Egg, and 1 Banana.  Using a fork, mash the banana against the side of the bowl.  Stir to combine.  To the dry ingredients add 1/2 Cup Chopped Nuts and 2/3 Cup Frozen Blueberries.  If the berries aren't frozen it's ok.  I pick them fresh and put them in the freezer once I decide I am making muffins.  Mix the wet ingredients with the dry and stir until combined.  Place in muffin cups either greased with Crisco or use muffin papers.  Bake for about 20 minutes or until fragrant and golden brown.  Enjoy!

Saturday, June 5, 2010

Zucchini Bread

It's summer and what to do with that oversized Zucchini from your garden...or your neighbors?  Make bread, that's what.  Last summer my father in law brought over some beautiful vegetables and the zucchini was huge.  I immediately thought to make bread with it.  It's a simple recipe going back to 7th grade food class when we made muffins.  Measure dry onto one bowl, measure wet into a measuring cup, add together mixing until just combined.  Bake and what a wonderful treat!
Preheat oven to 375.  Butter a 9.25 x 5.25 x 2.75 Wilton bread loaf pan.  Wash and cut the Zucchini into 4" long pieces.  Using a mandolin or the down and dirty version, the V-Slicer, with the cut side facing the blade, shred the zucchini using the 1/8" blade so you have match stick sized shreds.  You'll need about 2 1/2 cups of Zucchini.  
This is my own recipe.  In a bowl, mix together 3 Cups Flour, 2/3 Cups Packed Brown Sugar, 1/3 Cup Sugar, 2 tsp Baking Powder, 1/2 tsp Baking Soda, 1 tsp Kosher Salt, a double pinch of Cinnamon, a touch of Cardamon, and a few grinds of fresh Nutmeg.  Hand mix with a wire whip to combine ingredients.  Set aside.  In a 2 cup measuring cup begin stacking these ingredients, it'll save on the cleanup!  1/2 Cup Canola Oil, 1/4 Cup Milk, 1/4 Cup Sour Cream (add sour cream to the cup until line comes to 1 Cup), and 2 Eggs.  Mix with a fork until the egg is broken up and the sour cream is distributed.  Add zucchini to the bowl with dry ingredients.  Add the wet to the bowl and mix with a wooden spoon or rubber spatula until combined.  The batter will seem a bit sticky and possibly slightly dry but not to worry, zucchini is a watery vegetable and will make it all good in the end!  Place in oven and reduce heat to 350.  Bake for 1 hour 15 minutes until it is fragrant and the bread pulls from tsothe side of the pan.  Enjoy any time during the day with butter or an orange flavored cream cheese.  Best right out of the oven.  For reheating, I like to cut thick slices and warm in the toaster.

Saturday, May 22, 2010

Quick Omelette

Many years ago, I changed drastically the way I make omelettes.  As a kid, I added everything to the bowl and put it in a hot pan.  I stirred until it set up and I folded it over.  I had to turn over this incredibly heavy laden egg to cook the other side and it always broke apart and made a huge mess. 
Now I use of a method you see at omelette stations in hotels, though theirs are larger than just 1 egg. 

Heat empty 8" skillet.  Meanwhile beat 1 Egg with a Tbl of Milk and any herbs you are using, in this case, Scallions.  Add 2 tsp Butter to hot pan and swirl to coat.  Add any kind of vegetables or meat to the pan at this time, and quickly heat.  Add the egg mixture and move the vegetables and meat around so they are evenlly distributed.  Once it is set, flip omelette over by tossing in the air.  Pictured, I am about to flip the omelette.  Top cooked side with cheese, in this case, I used grated Swiss.  While placing on a plate, fold it over.  The flipping part takes practice and knowing when to flip takes a practiced eye.  Once you get it down though, you'll never go back!